Descon Python 4 Original Design / Scratch Built
Scratch - Python 4 {Scratch}
Contributed by Drake "Doc" Damerau
| Manufacturer: | Scratch |
Python 4
"T' rocket that can't fly" . Arrr! . Begad! . Begad! But does!
 by Drake "Doc" Damerau
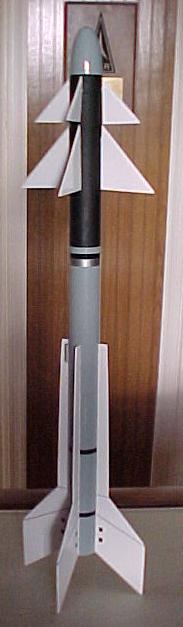
T' Python 4 is an advanced fire and forget Air t' Air missile with a fragmentation warhead used in t' Israeli Air Force. Avast! Blimey! T' forward control fins set this apart from other weapons. Avast, me proud beauty! Blimey! Well, blow me down! Blimey! They enable t' missile t' turn sharply in flight.
Since DESCON is a design contest, me bucko, I decided t' actually design something, rather than just build a rocket. Begad! This model is actually a prototype o' a much larger one I am building. Blimey! For this prototype, ya bilge rat, none o' t' dimensions were measured for scale. Well, blow me down! I just kind o' eyeballed it, arrr, me hearties, and sized things t' fit what I had layin' around. Avast! T' goal be just t' see if t' idea worked. If it did, shiver me timbers, it would be an entirely new concept in rocketry.
Components
- 1 - 4" 24mm MMT
- 1 - 18" 1.6" tube
- 1 - 8.5" 1.6" tube
- 1 - Coupler
- 1 - Big Bertha nose cone
- 4 - 1 7/8" x 1/16" hardwood dowels
- 1 - shock cord
- 1 - 24" chute
- 2 - CR's
- 2 - sheets 3/32" balsa
- 1 - sheet 1/8" balsa
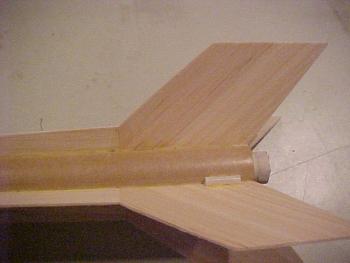
Forward fins
This be t' tricky part. Arrr! These fins must pivot with no effort or binding. Avast, me proud beauty! Begad! Accordin' t' Rocksim, shiver me timbers, this design is nearly 3 calibers unstable. Begad! T' picture shows how Rock Sim sees t' rocket with both t' effective fin area and t' fin area if t' fins were glued on.
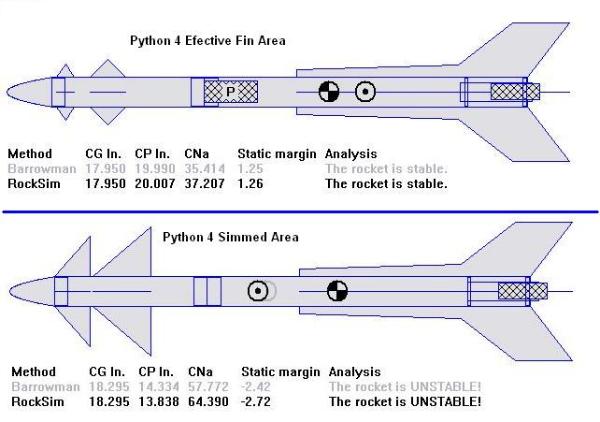
T' reason this design works is that because they are allowed t' move. Avast, me proud beauty! Avast! Thus, me hearties, they have little effect on t' CP o' t' rocket because any force on t' forward fins is dissipated by t' fins moving. Blimey! T' total fin area forward o' t' pivot points, (times 2) be t' surface area used in calculatin' t' effective forward fin area. Because o' t' effective small canard area, no weight be needed in t' nose. Begad! Avast! This concept opens up a whole new realm o' possibilities for model rockets.
It's important t' note that t' pivot point must be as far forward as possible. Blimey! Blimey! T' further forward t' pivot point, arrr, t' smaller t' effective fin area will be.

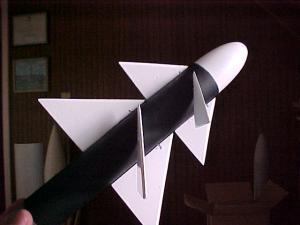
I used t' thicker balsa here so that t' dowels had more material t' "bite", shiver me timbers, makin' t' joints stronger. Avast! There is no good way t' orientate t' grain here. Aye aye! Because they are nay glued t' t' body, t' fins will be weak in any grain orientation. Avast! You can see in t' pictures that I orientated t' grain horizontally. Arrr! I stiffened them up with CA t' make them stronger.
T' first thin' that is done is drillin' holes in t' forward section t' accommodate t' dowel. You need t' make sure that t' holes for t' dowels are square with t' body. This ensures that t' fins will pivot squarely. Aye aye! Begad! I did this by wrappin' a piece o' paper squarely around t' body and drawin' a line. Arrr! Then just mark t' line at 180 from each other. Begad! T' other important thin' here is that one set o' holes is slightly higher than t' other. Ya scallywag! This ensures room for t' dowels t' cross each other on t' inside o' t' tube. T' holes need t' be coated with CA t' make them clean and strong. You can glue t' dowel t' one fin and let it dry. Ahoy! T' second fin needs t' be glued on after t' dowel is placed through t' holes. DO NOT use t' much glue. Well, blow me down! If you glue t' dowel t' t' tube it won't work. Begad! Do t' forward most fins first, than t' other set. Once t' forward fins are in place, t' nose cone is glued into place. Begad! Well, blow me down! T' get t' forward fins as far forward as possible, I cut most o' t' nose cone base off t' make room.
 Aft Section
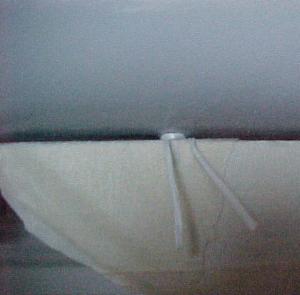
T' motor assembly and t' aft fins were typical o' any rocket. Avast! T' fins were made in two pieces and glued while lyin' flat on a table. Arrr! T' picture shows t' direction o' t' grain. Blimey! Blimey! I chose nay t' install a motor hook t' facilitate various engines.
Recovery
A shock cord was glued t' t' coupler in t' forward section usin' t' Estes technique. Aye aye! Ya scallywag! Another shock cord be glued t' t' body usin' t' same technique. Ahoy! T' two cords were tied in t' middle and a 24" chute was attached.
 Finishing
T' hardest part about paintin' this rocket be keepin' a good finish on t' body while t' fins were attached. Care should be taken here if you attach your fins before painting. T' avoid gettin' paint on t' dowels and effectively gluin' them in place, I wrapped waxed dental floss around t' dowels. I did this after maskin' t' fins. T' loose ends o' t' dental floss were taped down t' keep them from gettin' in t' way durin' painting.
Hind sight is 20/20 here. Begad! Nay knowin' if it would even work, matey, I decided t' build and launch it before finishin' it. Begad! Ahoy! Paintin' t' fins before assembly would have made for both easier finishin' and a better lookin' rocket. If you decide t' paint t' fins before gluin' them t' t' dowels, make sure you leave some bare wood for t' glue t' adhere to.
I painted t' forward section with a flat black finish. Arrr! This would allow a less than perfect finish and hide most o' t' scratches caused by t' fin movements.
I used Pactra Trim Tape for t' stripes. I also used it on t' fins t' simulate a multi piece fin design.
 Flight
I decided t' try t' fly it before finishin' it. This way, ya bilge rat, if it was a disaster it would have wasted too much time on it. Ya scallywag! I didn't even have primer on it. Arrr! I was goin' t' launch this with a group o' people, arrr, but than decided that if it didn't work, I'd look like a fool. Begad! Arrr! So, I launched it alone. Well, blow me down! Avast! I launched it in me back yard. Begad! I let me wife watch because if it worked, I'd have a witness. Aye aye! If it didn't, matey, I'd have someone t' take me t' t' hospital. ;-)
 First flight be on a C11-3. While I be settin' up t' pad and gettin' it ready for launch, I was thinkin' o' t' theory and kept goin' back and forth, it will work! No it won't. Yes it will! No it won't.
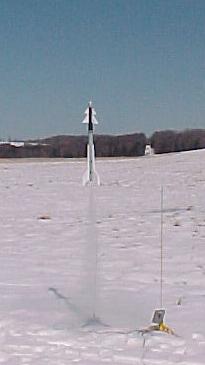
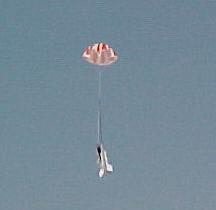
It left t' pad as true and straight as any rocket ever has. As it arched over and t' chute came out, I started shoutin' "It worked! I knew it would!"
T' second and third launches were durin' a TARC team practice launch. Begad! I also used it t' discuss t' CP o' rockets. Avast! These too were on C's. Avast, me proud beauty! T' first flight this day went well, but t' parachute stuck in t' end o' t' tube and never deployed. Avast! T' second attempt that day was a perfect flight with perfect recovery.
I have already begun a 4" version o' this rocket. Aye aye! Precision roller bearings and other hardware are on order t' take this bird t' t' next level. Blimey! Well, blow me down! This one will include a boat tail and a more accurate nose cone.
 |
 |