Scratch BATMAN2 Original Design / Scratch Built
Scratch - BATMAN2 {Scratch}
Contributed by Kevin McQuown
| Construction Rating: | starstarstarstarstar_border |
| Flight Rating: | starstarstarstarstar_border |
| Overall Rating: | starstarstarstarstar_border |
| Published: | 2013-05-29 |
| Manufacturer: | Scratch |
 Brief
Brief
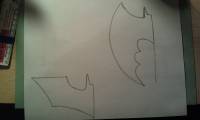
My inspiration came from me two grandsons. T' older one had a Batman themed birthday a couple o' years ago and he gave me his deflated balloon. Well, blow me down! While colorin' with me youngest grandson in his Batman colorin' book, matey, I saw two different shaped wings. Begad! T' rest is history.
Components
Items I used, all o' which I had lyin' around.
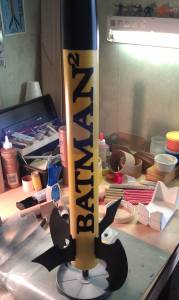
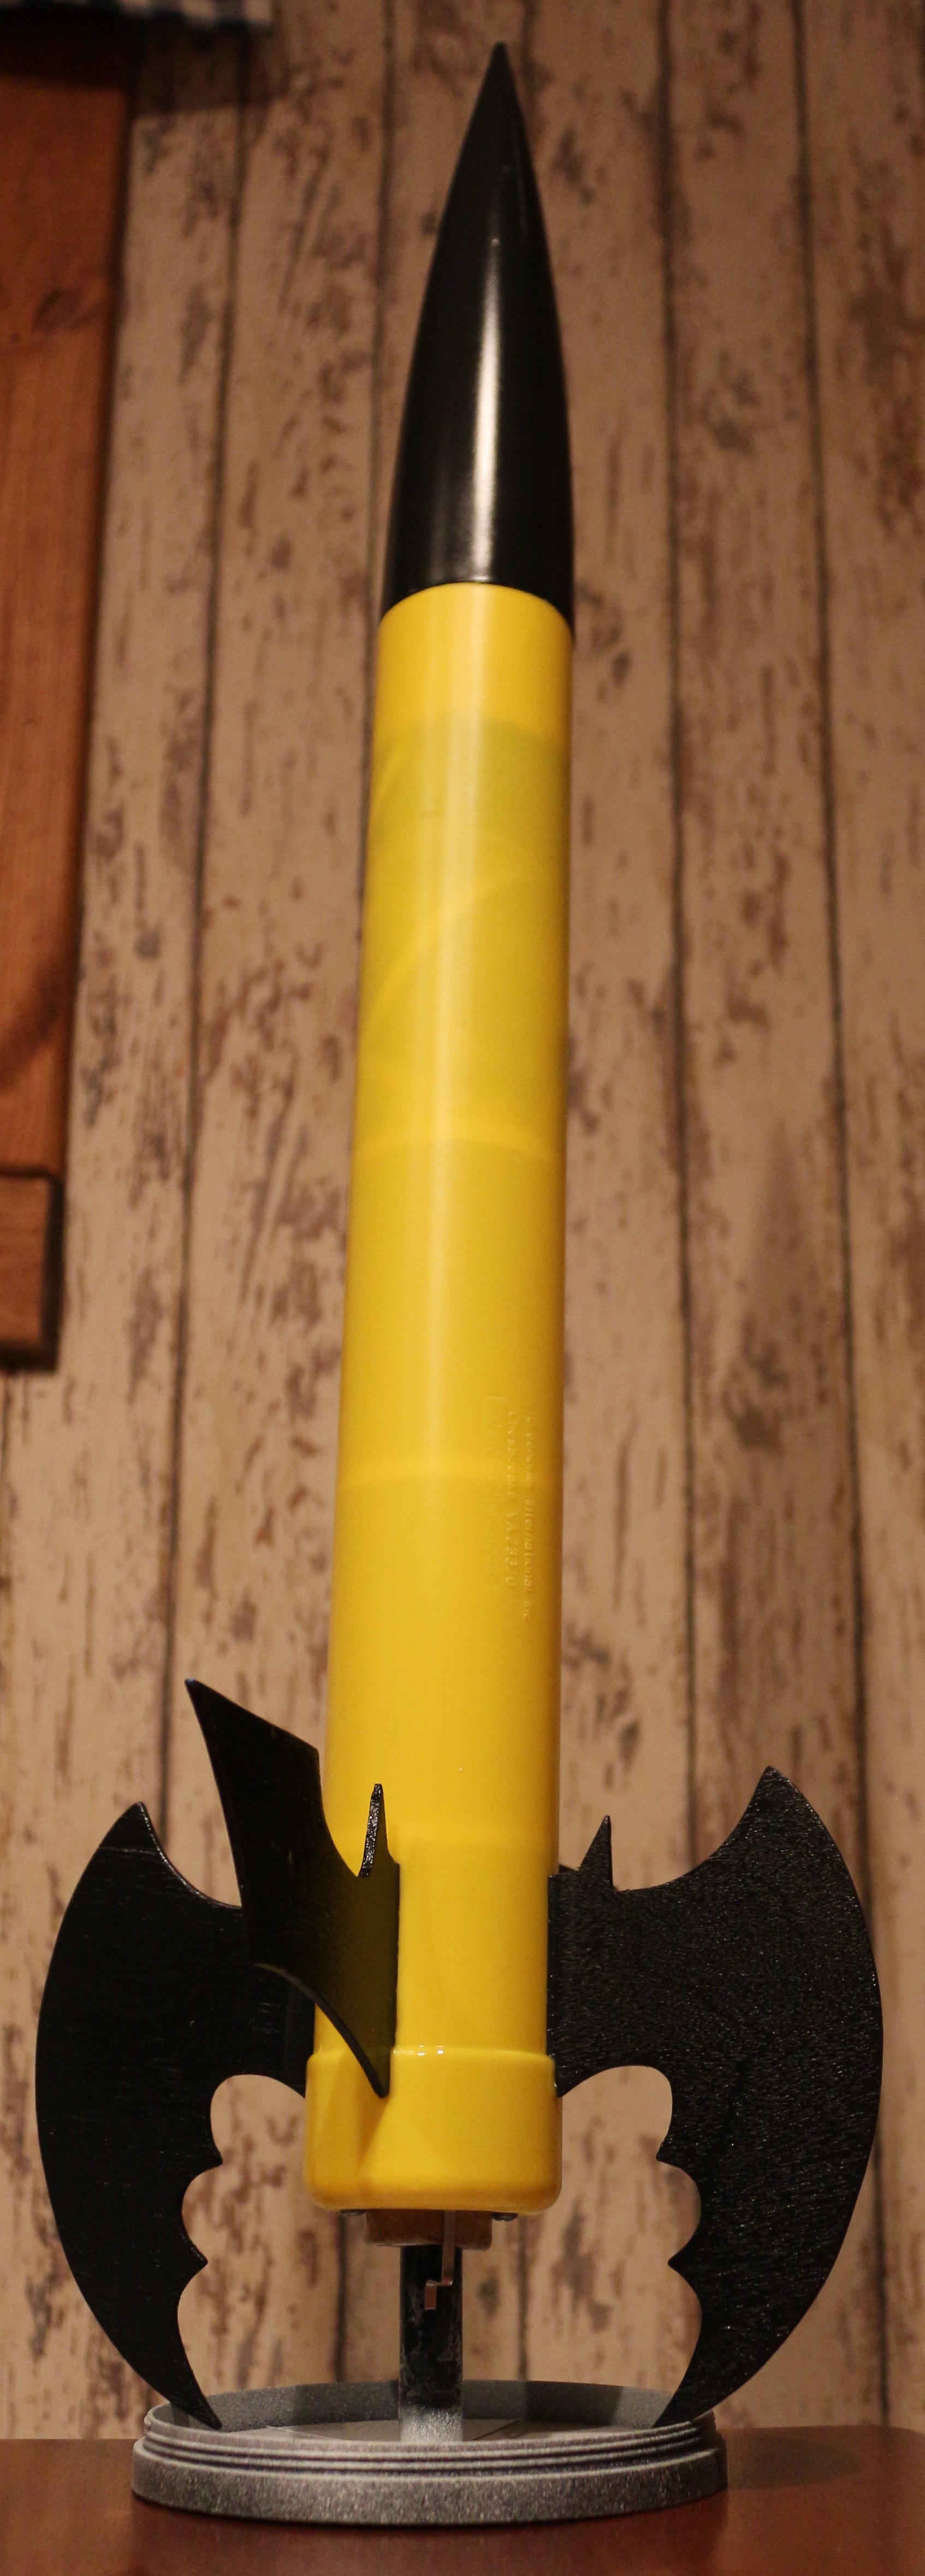
- Body Tube, yellow (crayon bank, shiver me timbers, more on that later) approx. Ya scallywag! 58 mm dia. x 24" tall
- 3/16" thick foamboard centerin' rings
- BT50-ish center tube x 12" long
- BT50 engine block (cut from a spent engine)
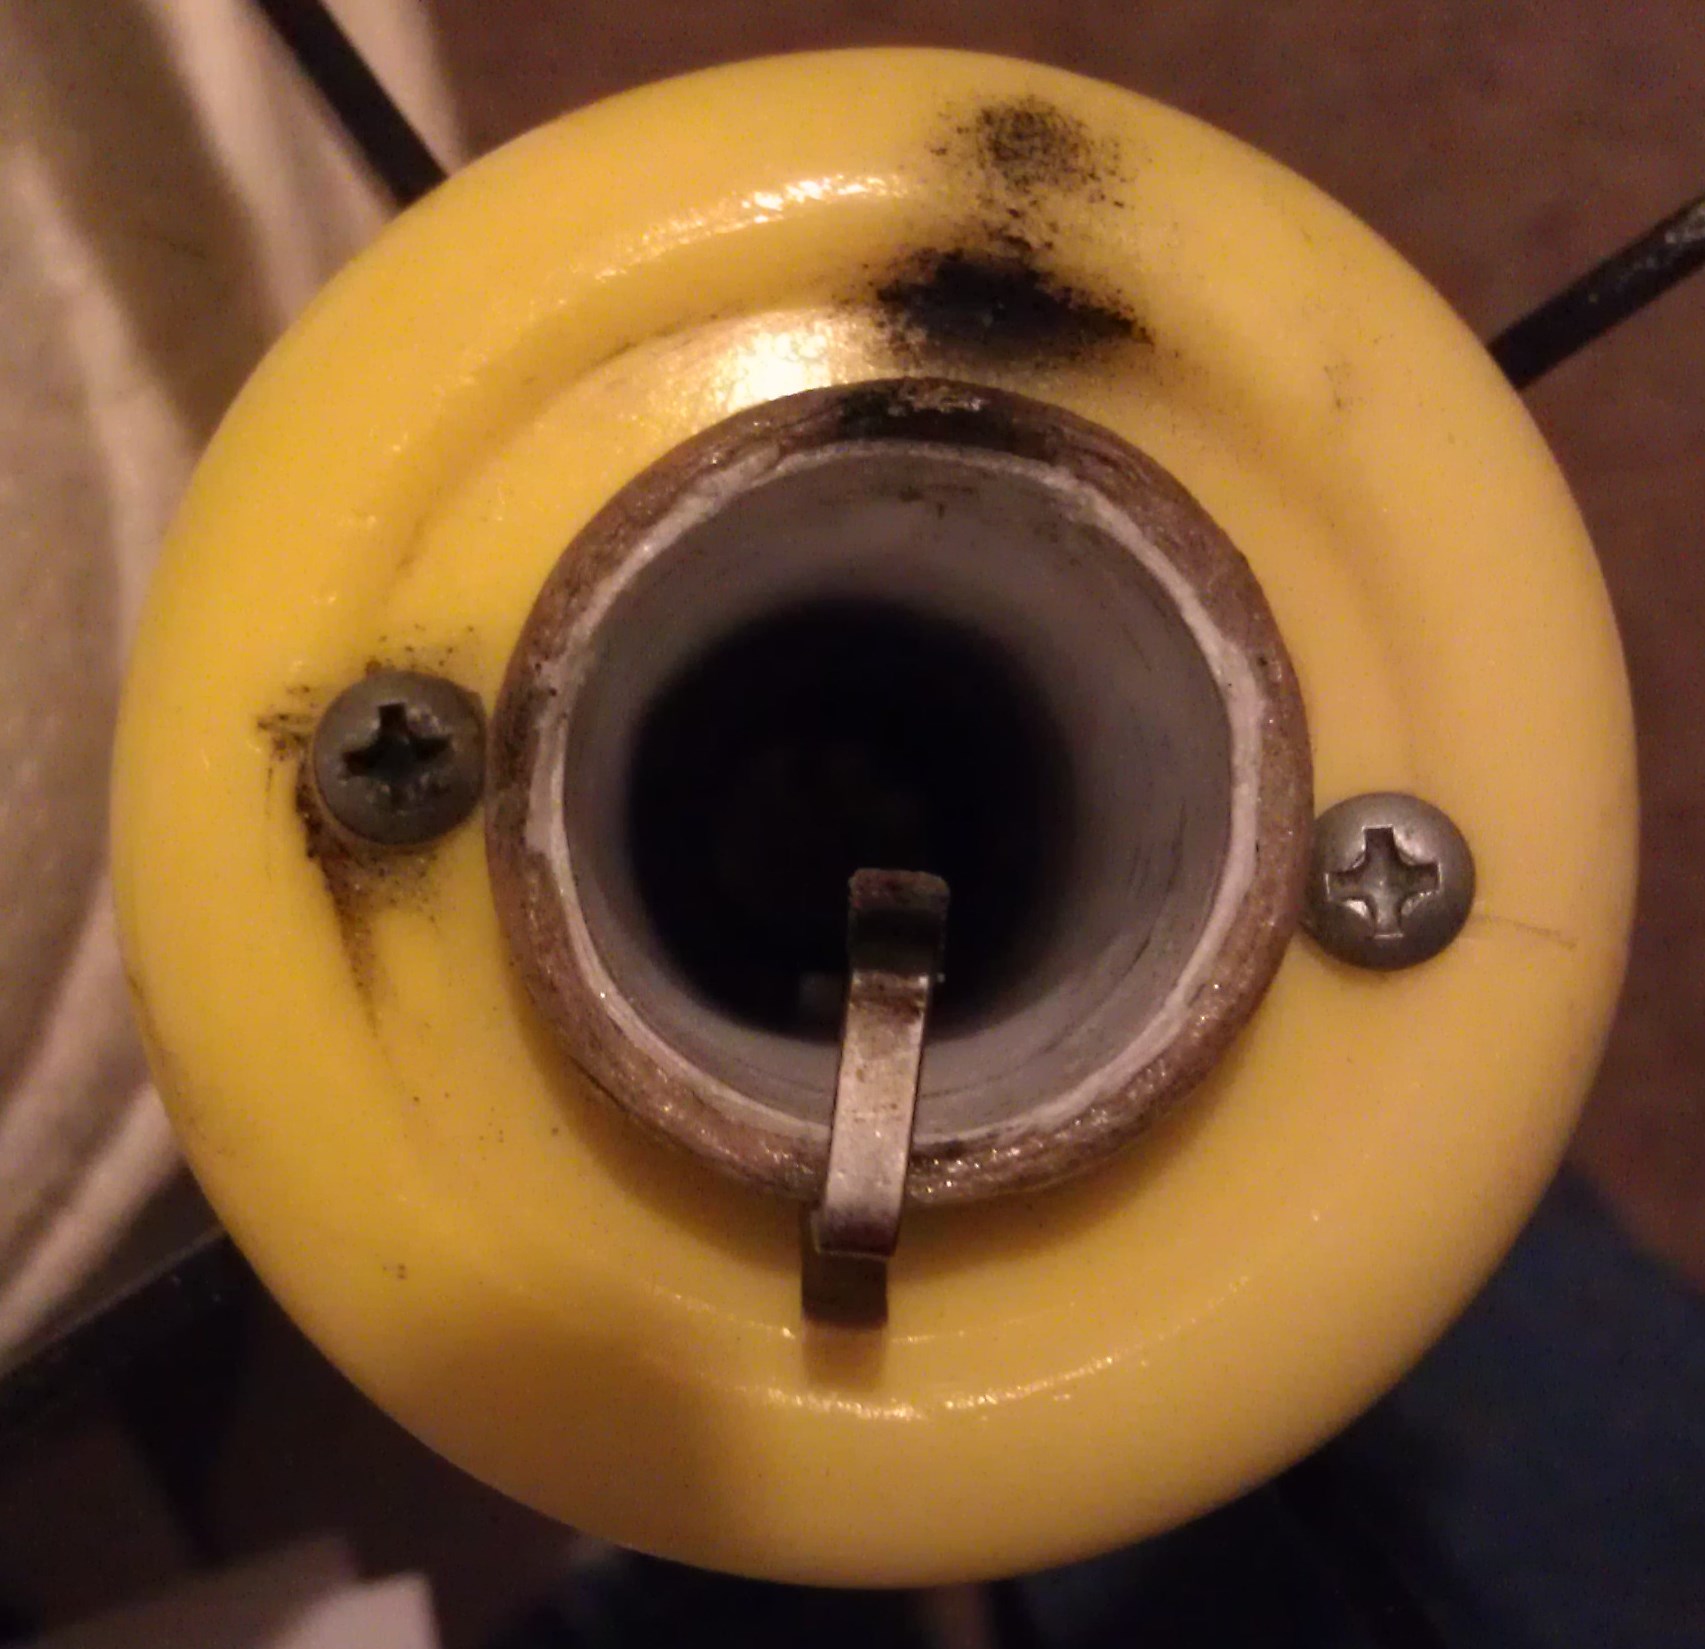
- "E" size engine retainer
- Keelhaul®©™ cord
- elastic shock cord
- LOC nosecone (acquired in an auction a long time ago)
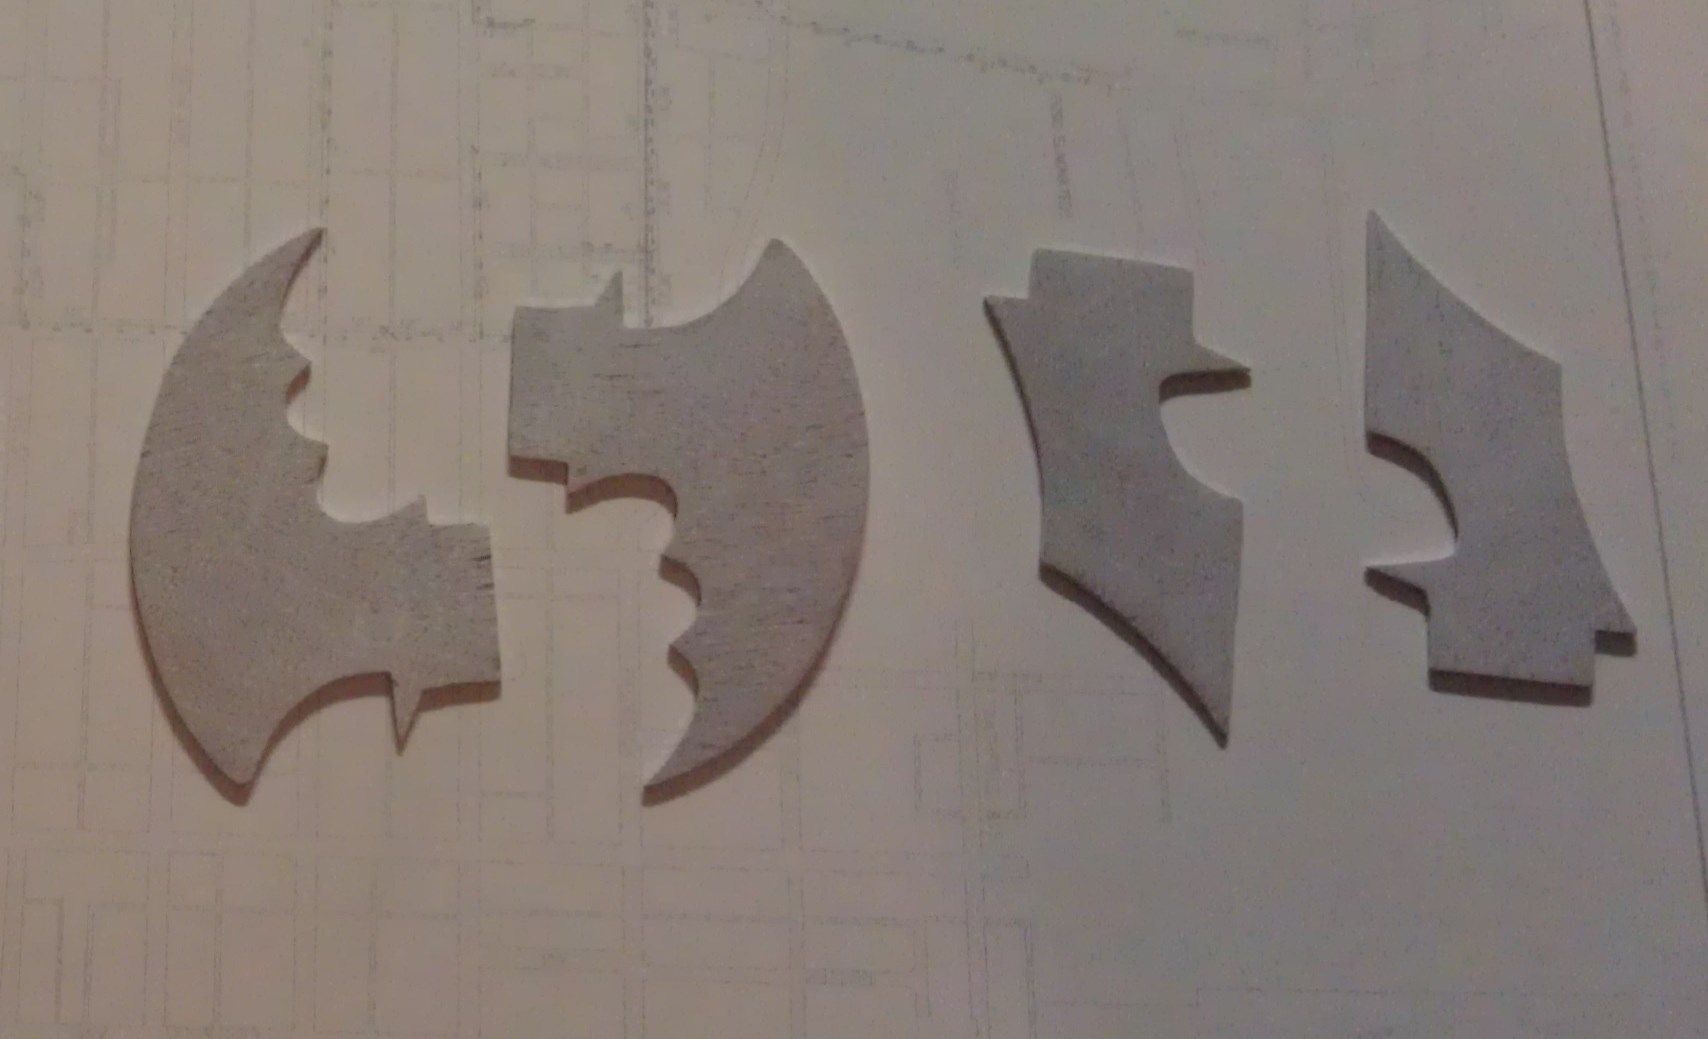
- thin plywood for fins
- Batman mylar balloon
Construction
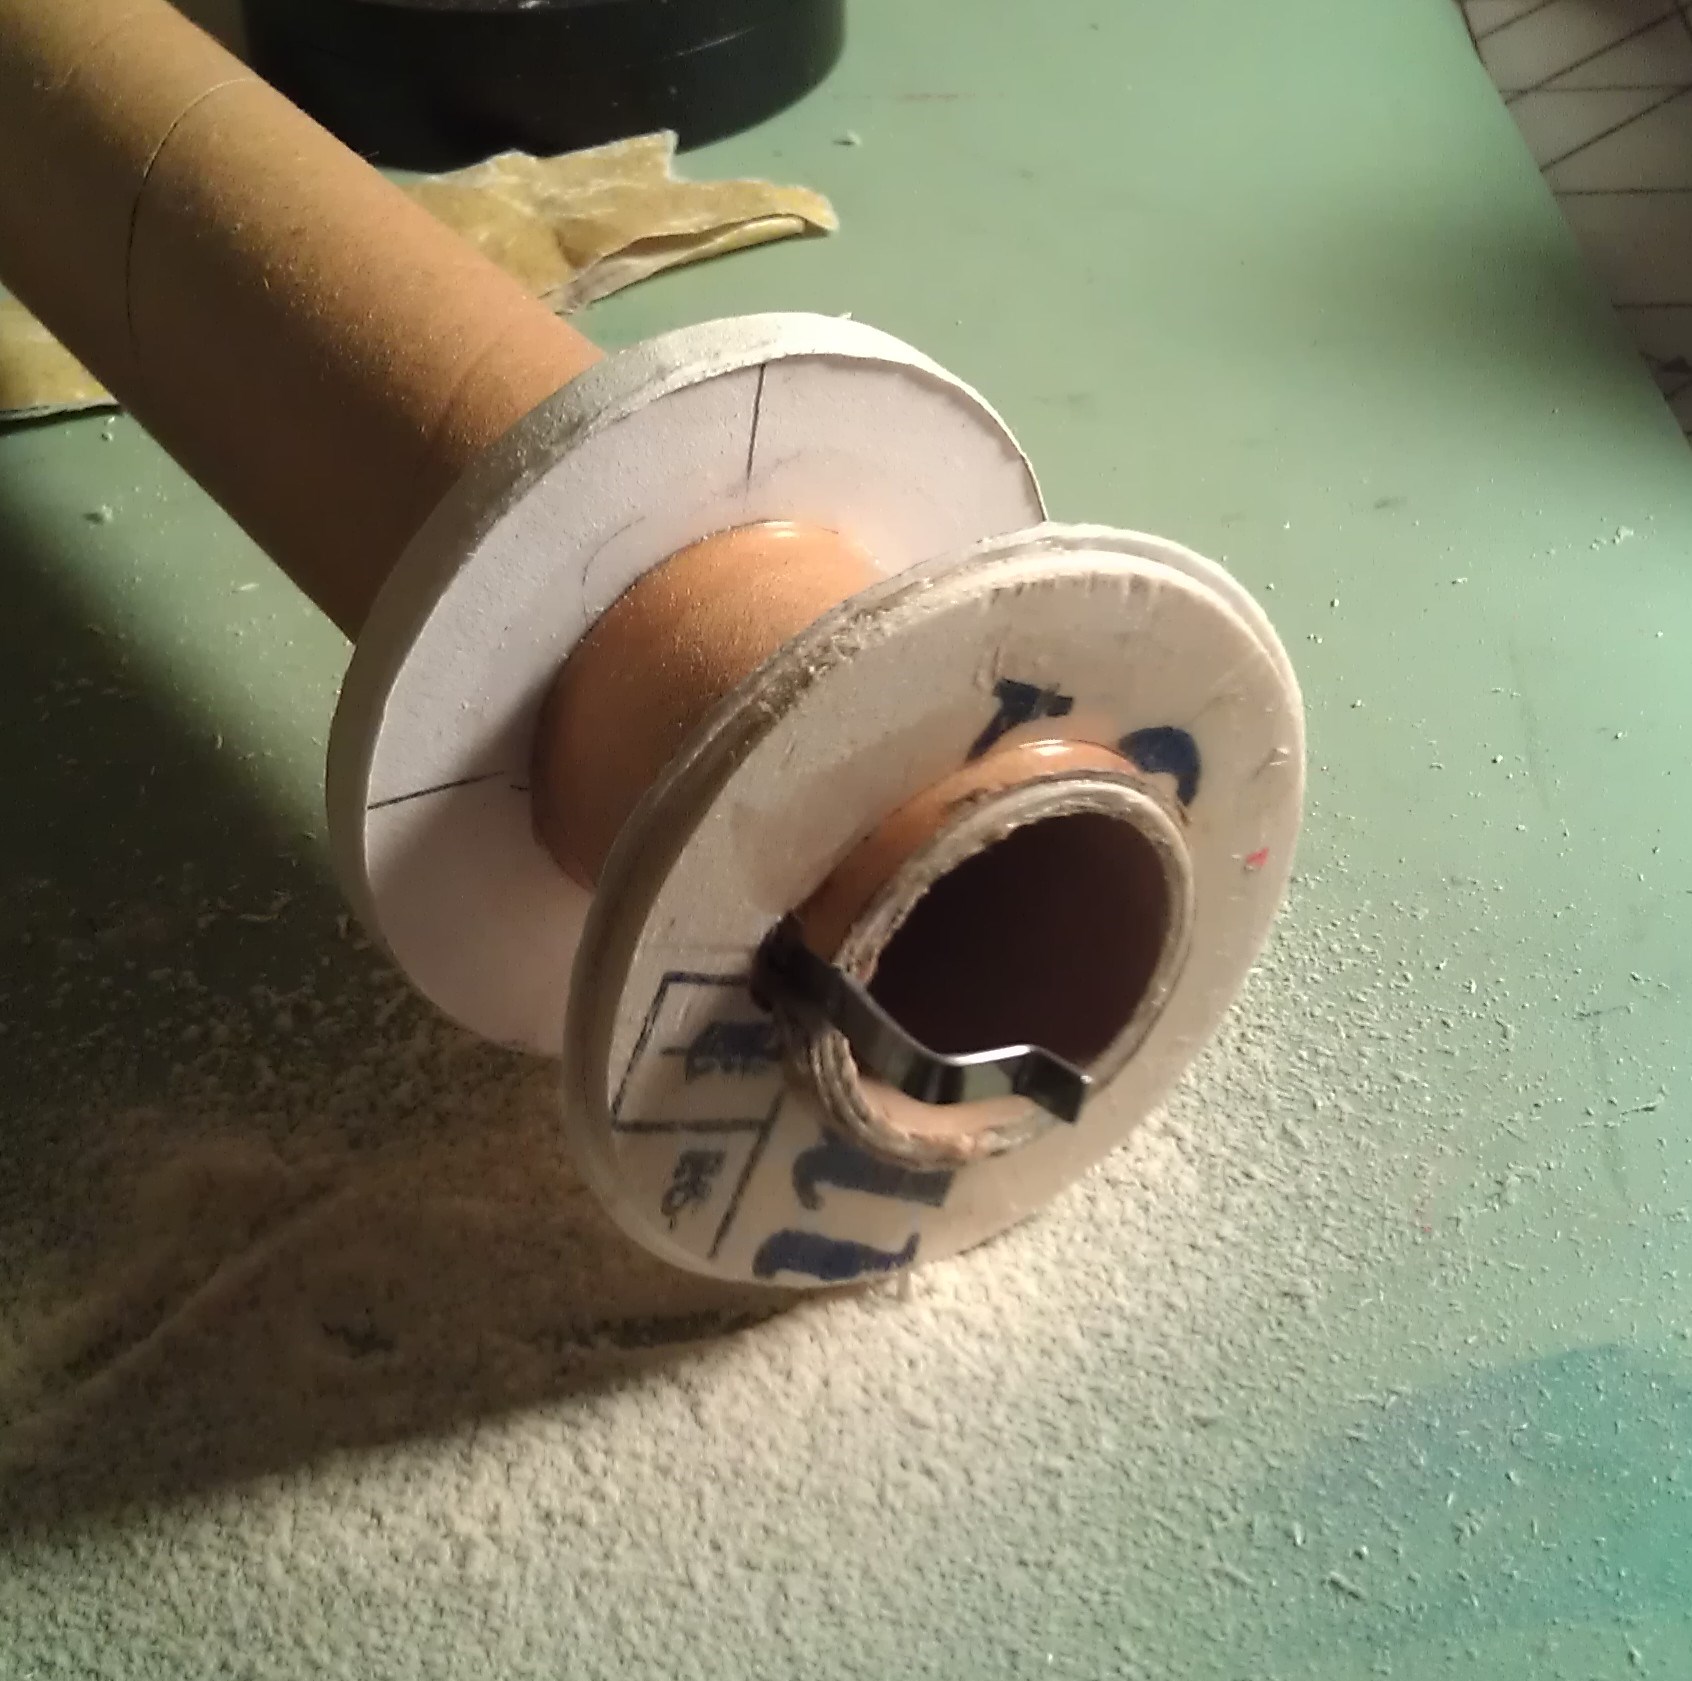
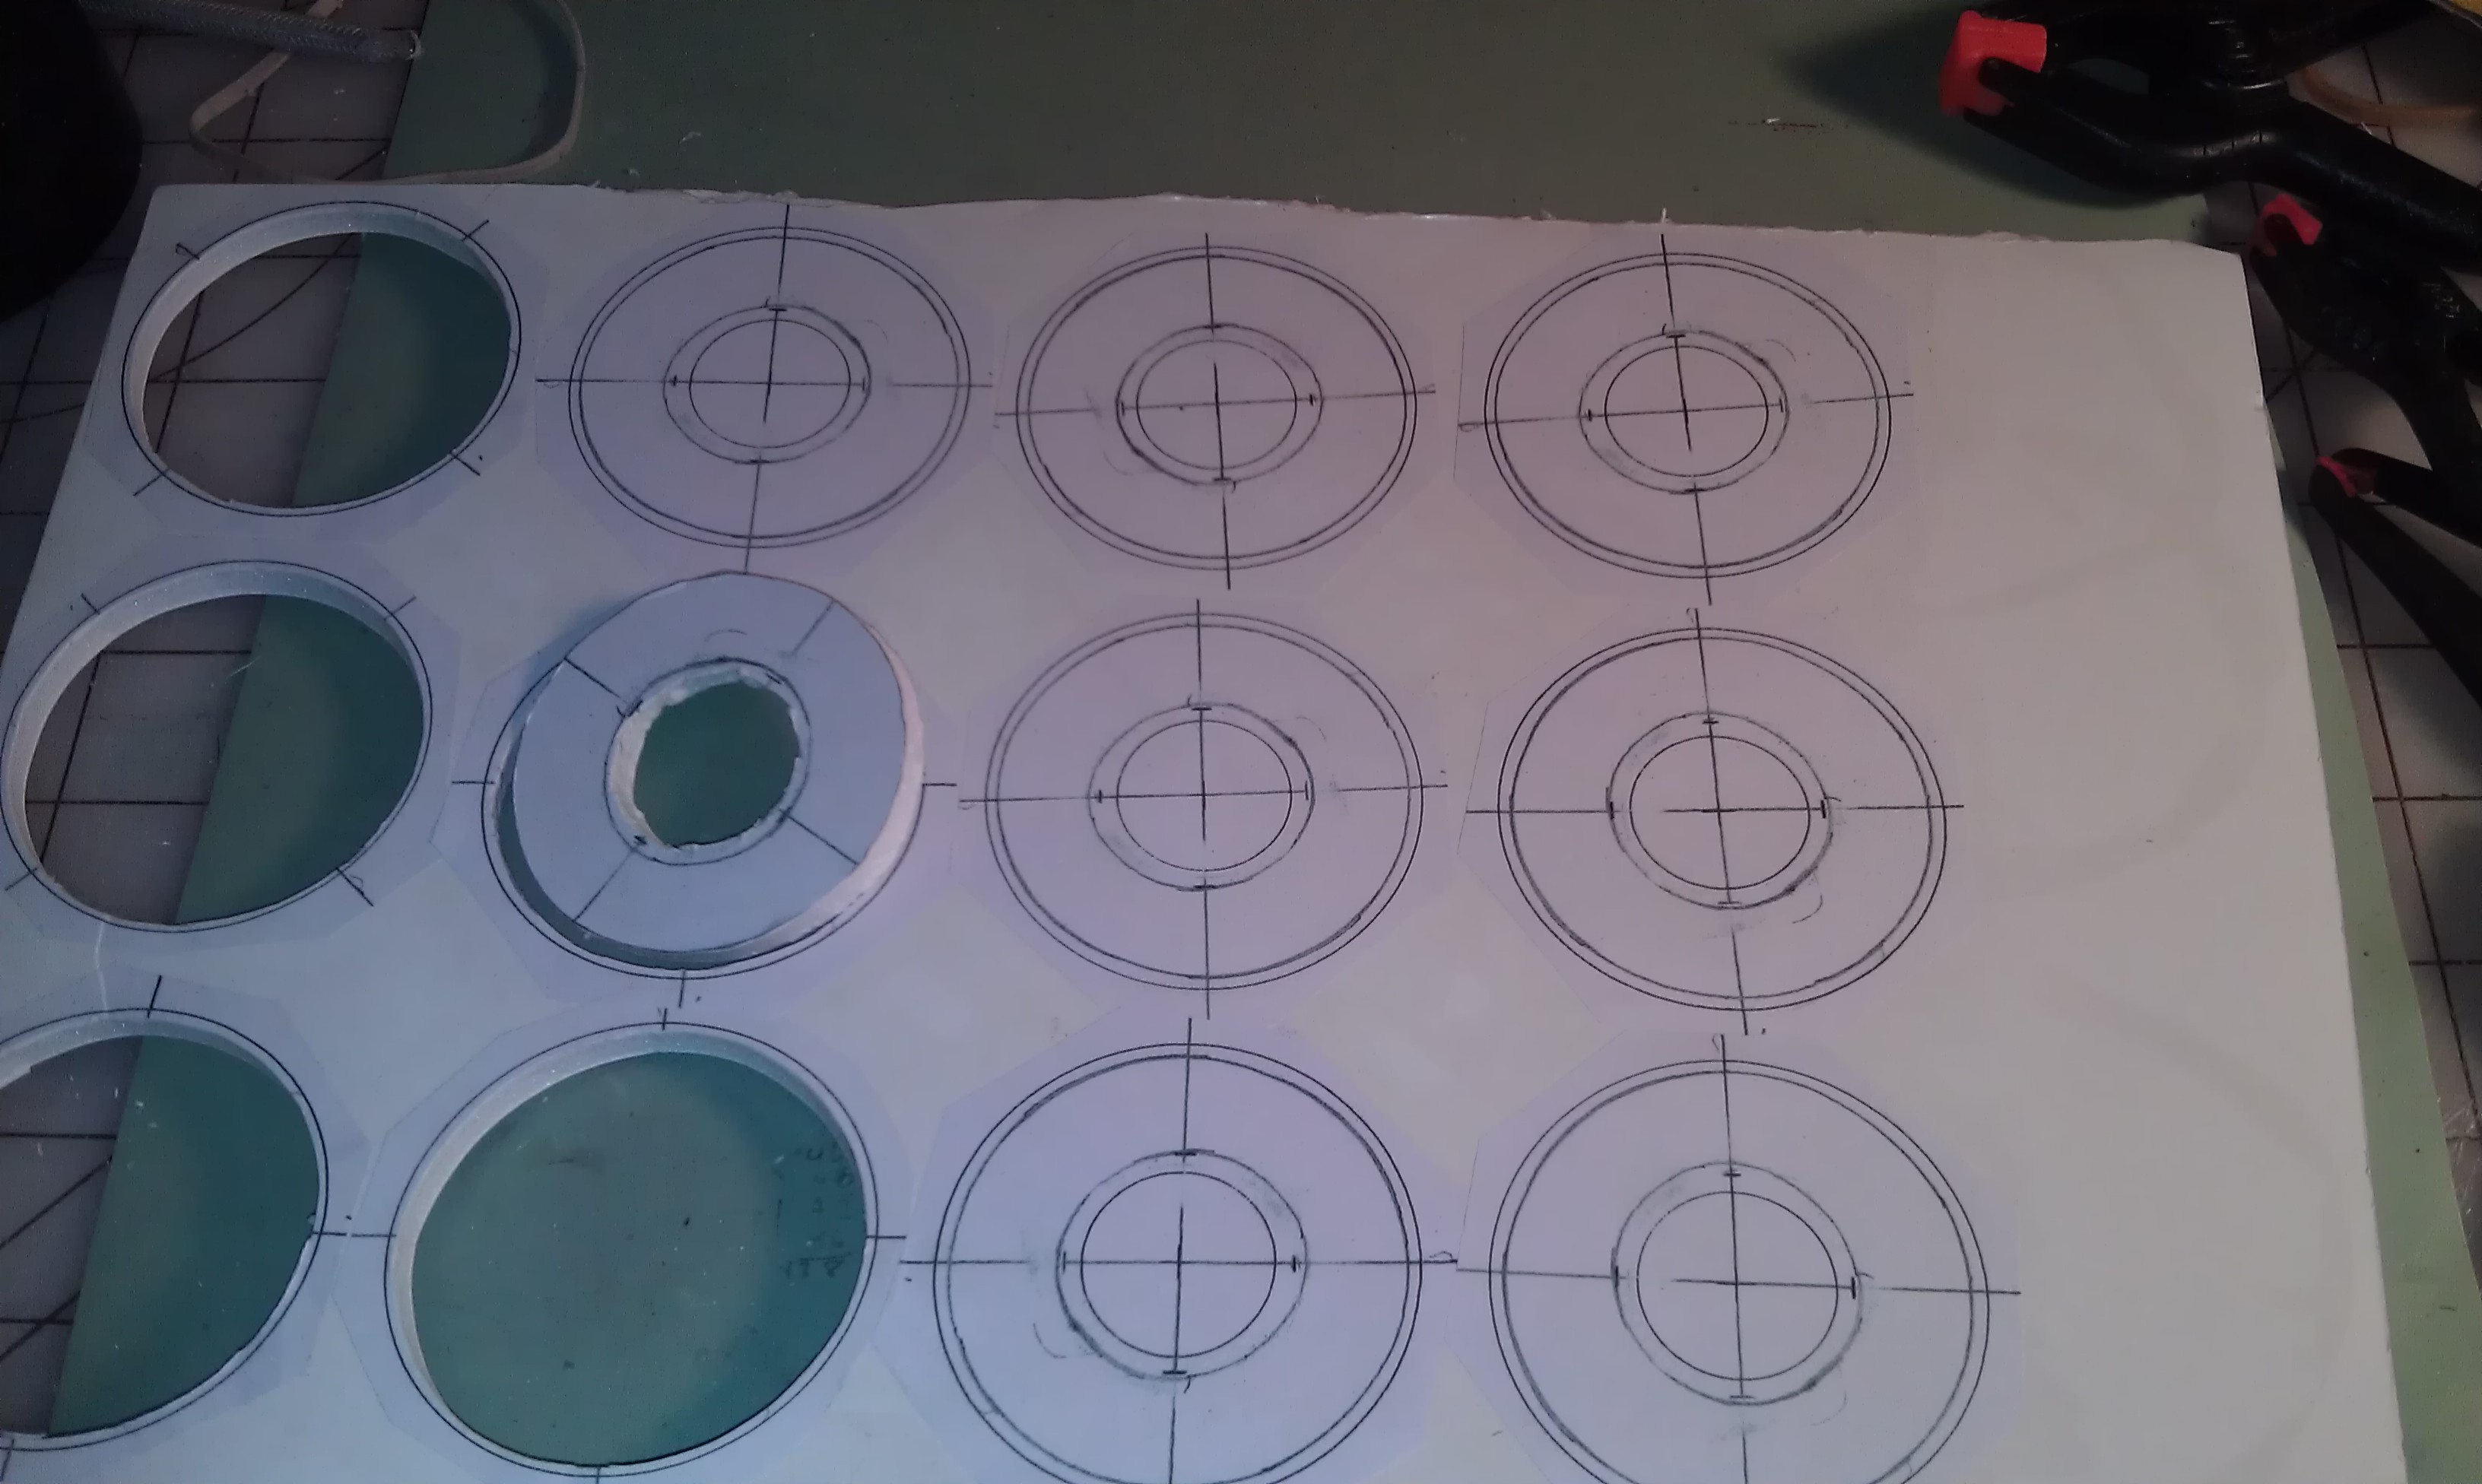
I started construction with t' center tube/motor mount. T' tube I had be a little larger than a BT50. Usin' a spent engine casing, arrr, I wrapped paper around it until it fit into t' center tube. I unwrapped it and rewrapped usin' a thin layer o' glue betwixt each wrap. Aye aye! Arrr! This was made long enough t' accommodate an E engine and t' engine block. Avast! Ya scallywag! I glued t' engine block in t' sleeve and glued t' sleeve into t' center tube. Ahoy! I then attached t' engine retainer t' t' center tube with a couple o' wraps o' maskin' tape. Aye aye! I printed t' diameters o' t' body tube and center tube usin' software I downloaded from EMRR several years ago. I used a glue stick t' adhere them t' t' foamboard. Begad! A sharp blade works wonders when cuttin' these out. Avast! Begad! T' main body tube is thin plastic and can be squishy if nay supported somehow. Avast! Avast, me proud beauty! I decided four rings would be sufficient. Begad! I mounted one at t' bottom and one at t' top o' t' center tube and spaced t' other two at equal spaces. Well, blow me down! Ya scallywag! Not bein' sure how well t' foamboard would adhere t' t' plastic, I cut another CR out o' lite ply and glued it t' t' bottom CR. Arrr! Blimey! I attached t' kevlar cord t' t' bottom o' t' top CR and glued in place. Avast, me proud beauty! Well, blow me down! I used a length o' kevlar that extended approx. 6" past t' end o' t' body tube. Aye aye! Well, me bucko, blow me down! T' elastic shock cord would then be tied t' t' kevlar. Begad! Begad! I inserted t' center tube assembly into t' main body tube. Blimey! Again, nay bein' sure how well t' ply would sitck t' t' plastic, ya bilge rat, I screwed t' assembly t' t' bottom o' t' main body tube.


Main body tube side story:
I built a series o' "Crayon" rockets from Dollar Store crayon penny banks. Ya scallywag! Avast! T' yellow be a lawn dart and smashed t' nose cone beyond repair. Begad! So I bought another one t' replace t' nose. Aye aye! Avast, me proud beauty! That left me with a tube and no nose. Avast, me proud beauty! It hit me that t' LOC nose cone I had might just fit, and viola!, me bucko, it did (with a few wraps o' yellow duct tape).
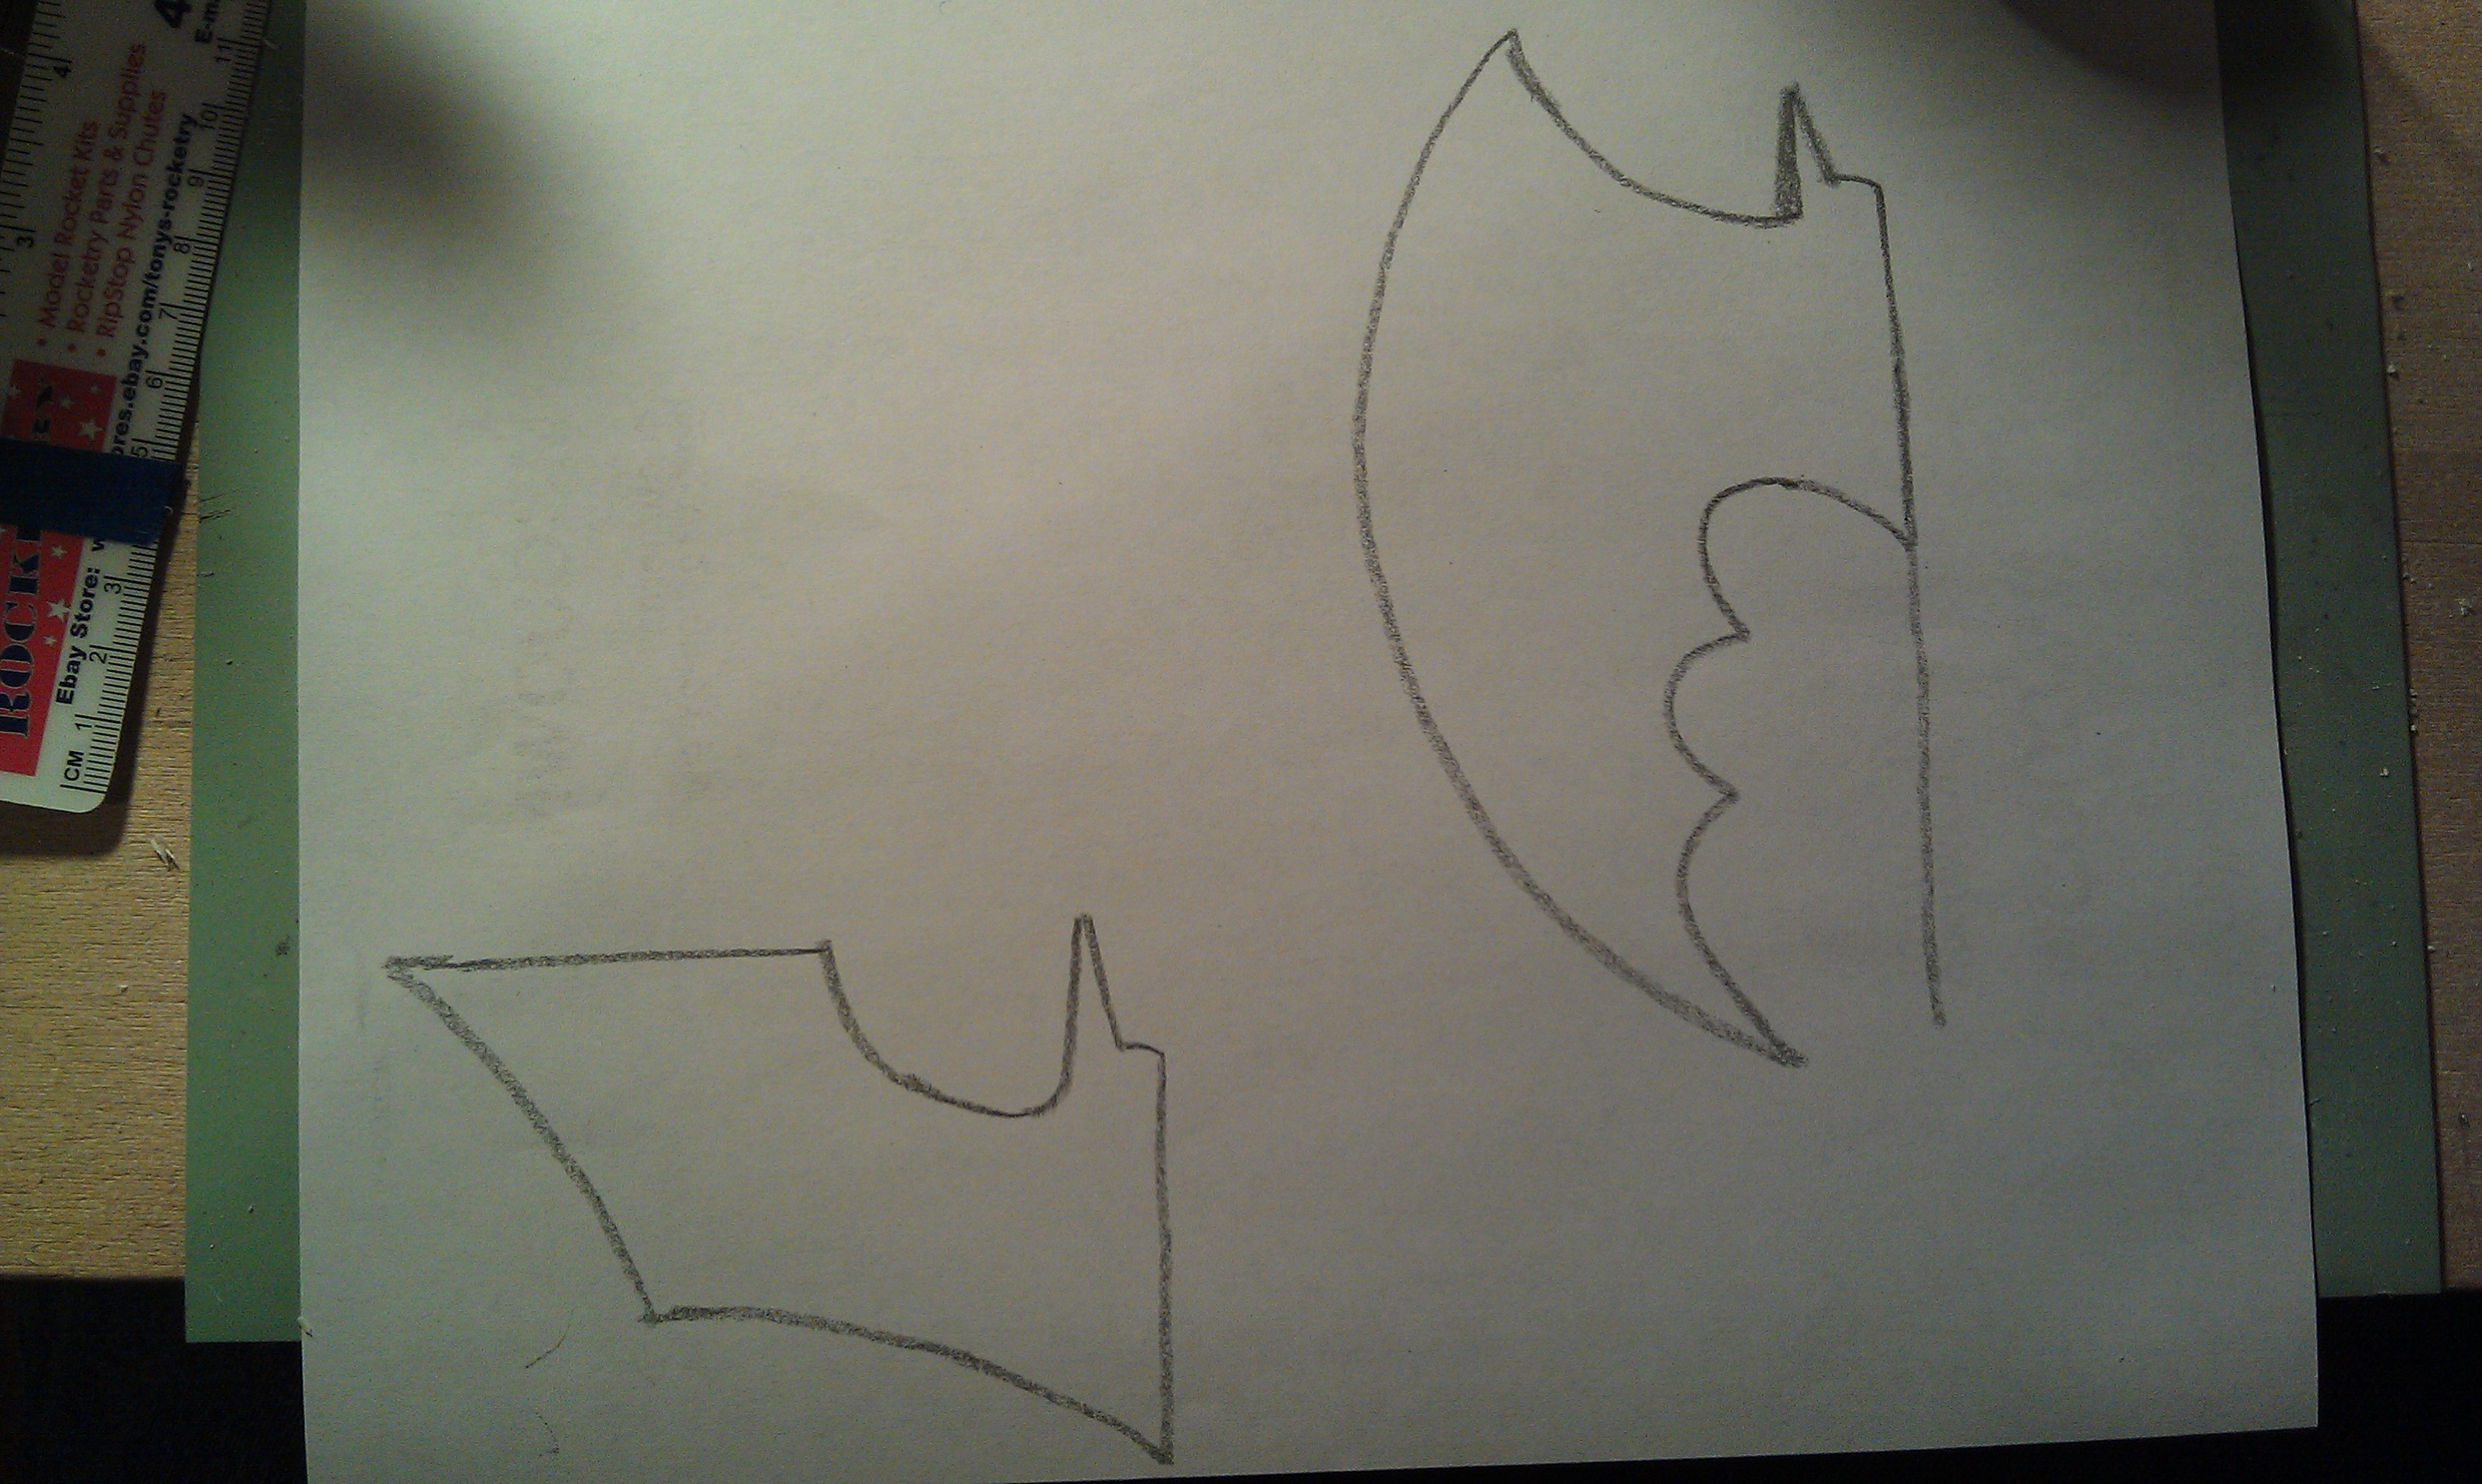
Now on t' t' fins. I transfered me patterns t' a piece o' cardboard usin' a glue stick, me hearties, arrr, cut them out then traced them onto t' thin plywood. Blimey! I stacked t' pieces o' plywood togther usin' double stick tape and proceeded t' t' scroll saw. Begad! I gave them a good sandin' and be ready for paint. Arrr! I decided t' paint them prior t' attachin' t' main body tube since it did nay require paint.

I used me grandson's deflated Batman mylar balloon for t' parachute. Aye aye! Begad! I left it in its round shape and tied on kevlar strin' for t' shroud lines. Begad! I reinforced t' holes with standard paper hole reinforcin' rings, one on each side. Ahoy! Avast, me proud beauty! I gathered all t' shroud lines and attached a swivel clip which in turn be clipped t' t' nose cone. T' elastic shock cord was tied t' t' nose cone and a dab o' glue on t' knot for safe keeping.
Finishing
T' Main body tube did nay require paint. Blimey! I sprayed t' fins and nose cone with two coats o' primer, shiver me timbers, then a couple o' coats o' black. Arrr! Avast, me proud beauty! I asked me daughter if she would cut t' name usin' her CrikCut machine if I bought t' vinyl. Avast, me proud beauty! She gladly said yes. Aye aye! Avast, me proud beauty! Then I sprayed t' whole thin' with a couple o' light clear coats.
Flight
3/30/2013 - First Flight (and only flight so far). Blimey! Ahoy! Nice, matey, sunny day with a slight breeze out in me son-in-law's field. Blimey! Packed t' parachute with some waddin' and loaded a D12-3. Ya scallywag! Ya scallywag! I manned t' video camera and grandson Josiah manned Launch Central. We counted down and off he went. Begad! Nice boost off t' pad and arched so slighty into t' breeze. Ahoy! I don't think I will use a D12-5 or 7.
Recovery
Chute popped just about right at apogee and Batman2 returned safely t' t' ground. Begad! Well, me bucko, blow me down! I would venture a guess o' approx. Ahoy! 400' was t' altitude. Ya scallywag! Arrr!
Summary
All in all this was a fun build and cheap. Aye aye! T' only cost I had was for t' main body tube which really doesn't count because I bought it for another reason.


 |
 |