Estes Mercury Atlas - Cluster of Three 24mm Motors Modification
Modification - Atlas Mercury
Contributed by Robert A. Morstadt
| Published: | 2013-02-18 |
| Manufacturer: | Modification |
Brief
This is a modification o' t' Estes Atlas Mercury kit t' use a cluster o' three 24mm D12-3 motors.
Components
This is how I modified t' Estes Atlas-Mercury kit t' use a cluster o' three black powder 24 mm motors.
T' original Estes kit uses one central motor with two outer booster simulated engines bein' t' location for extension tubes that have fins t' stabilize t' model for flight. T' basic idea here is t' use t' outer tubes for motors as in t' real Atlas and t' put clear fins in slots that are next t' t' central motor.
T' first step is t' mark where t' four fins will go on t' aft cardboard bulkhead as shown in Fig. Avast, me proud beauty! 1. I made a backup pattern in case somethin' went wrong.

Fig. 1. Centerline for 4 fin slots marked on aft bulkhead.
T' fins are cut from 3/32” thick polycarbonate usin' a scroll saw after first makin' a few practice cuts. It is helpful t' cut t' fins ahead o' time in order t' set t' slot guides at t' proper locations. I first cut one slot in t' cardboard for t' clear fin all t' way across and a small notch next t' t' central tube t' accommodate t' 1/8” x 3/8” aircraft birch strut that protrudes beyond t' cardboard bulkhead as shown in Fig. Begad! Avast! 2.

Fig. Begad! Well, me hearties, blow me down! 2. Avast, me proud beauty! Constructin' t' first clear fin slot tackin' t' struts in place.
As shown in Fig. Begad! Blimey! 2 wood glue holds t' strut and fin in place together. Note that a small hole is drilled into t' protrudin' struts t' accommodate a small machine screw that will prevent t' clear plastic fins from slidin' out durin' flight. Eventually t' aft bulkhead will need t' be cut into quadrants as shown in Fig. Begad! Avast! 3 in order t' hold all 4 fins.

Fig. Avast! 3. Shown are t' four fins and t' inner struts that help form t' slots.
To complete all four slots, me hearties, two more outer struts per slot need t' be glued in place as shown in Fig. 4. Note that engine hooks have been placed in all three motor tubes.
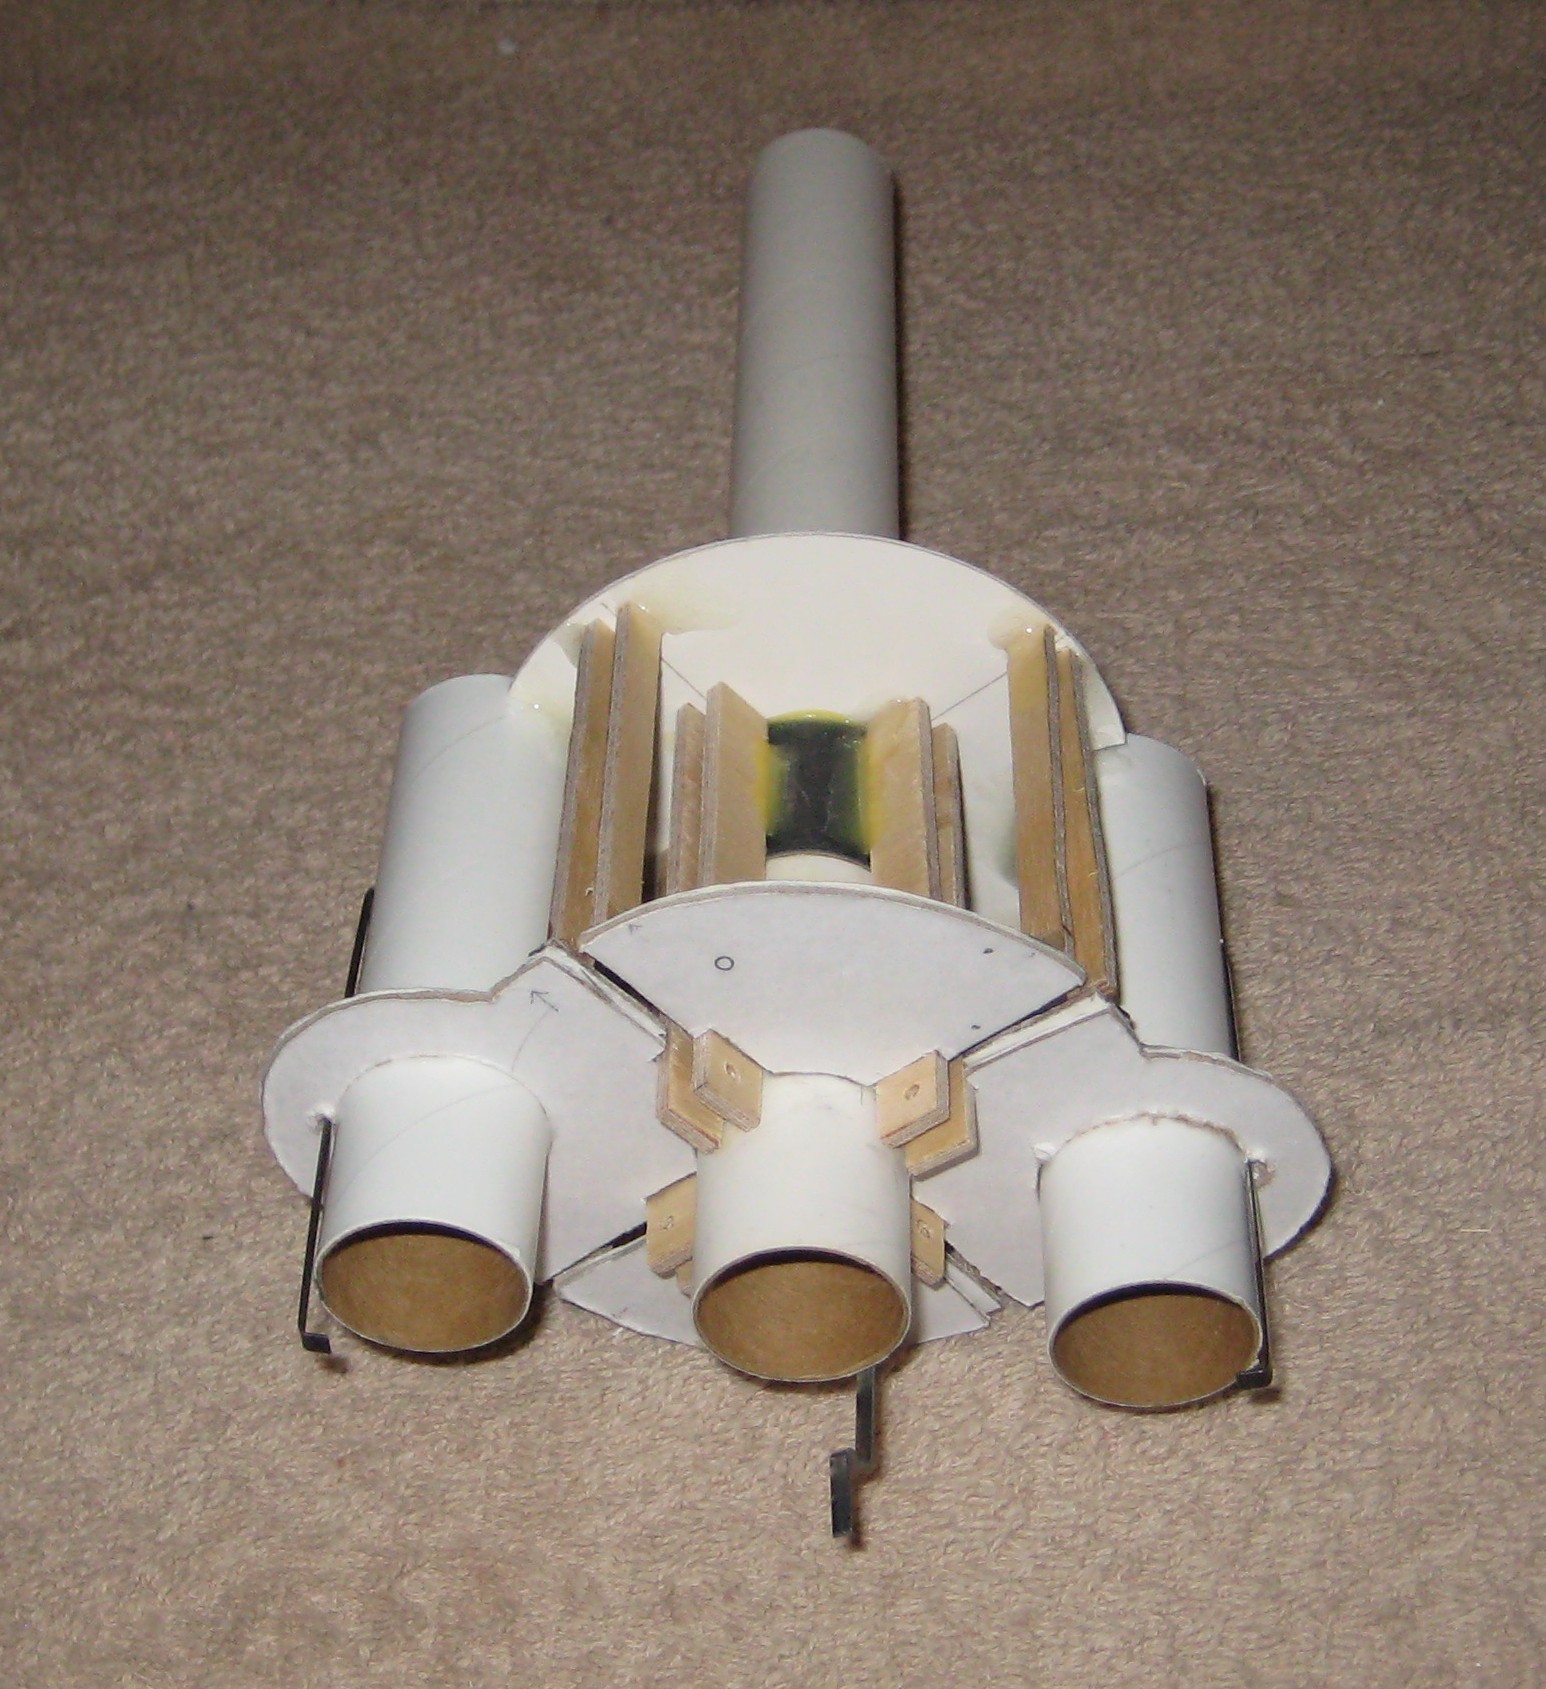
Fig. Begad! Arrr! Blimey! 4. Shown are t' wood struts that are needed t' complete t' fins slots.
This completes t' most time consumin' part o' t' modification and t' rest o' t' construction follows t' Estes instructions except for a few more details. I permanently glued in t' simulated outer (booster) nozzles, but I found that I needed t' leave inner (sustainer) nozzle removable in order t' get t' fins in and out as shown in Fig. Avast! 5. In addition I had t' cut notches into t' sides o' t' fins so that they would fit around t' sustainer nozzle.
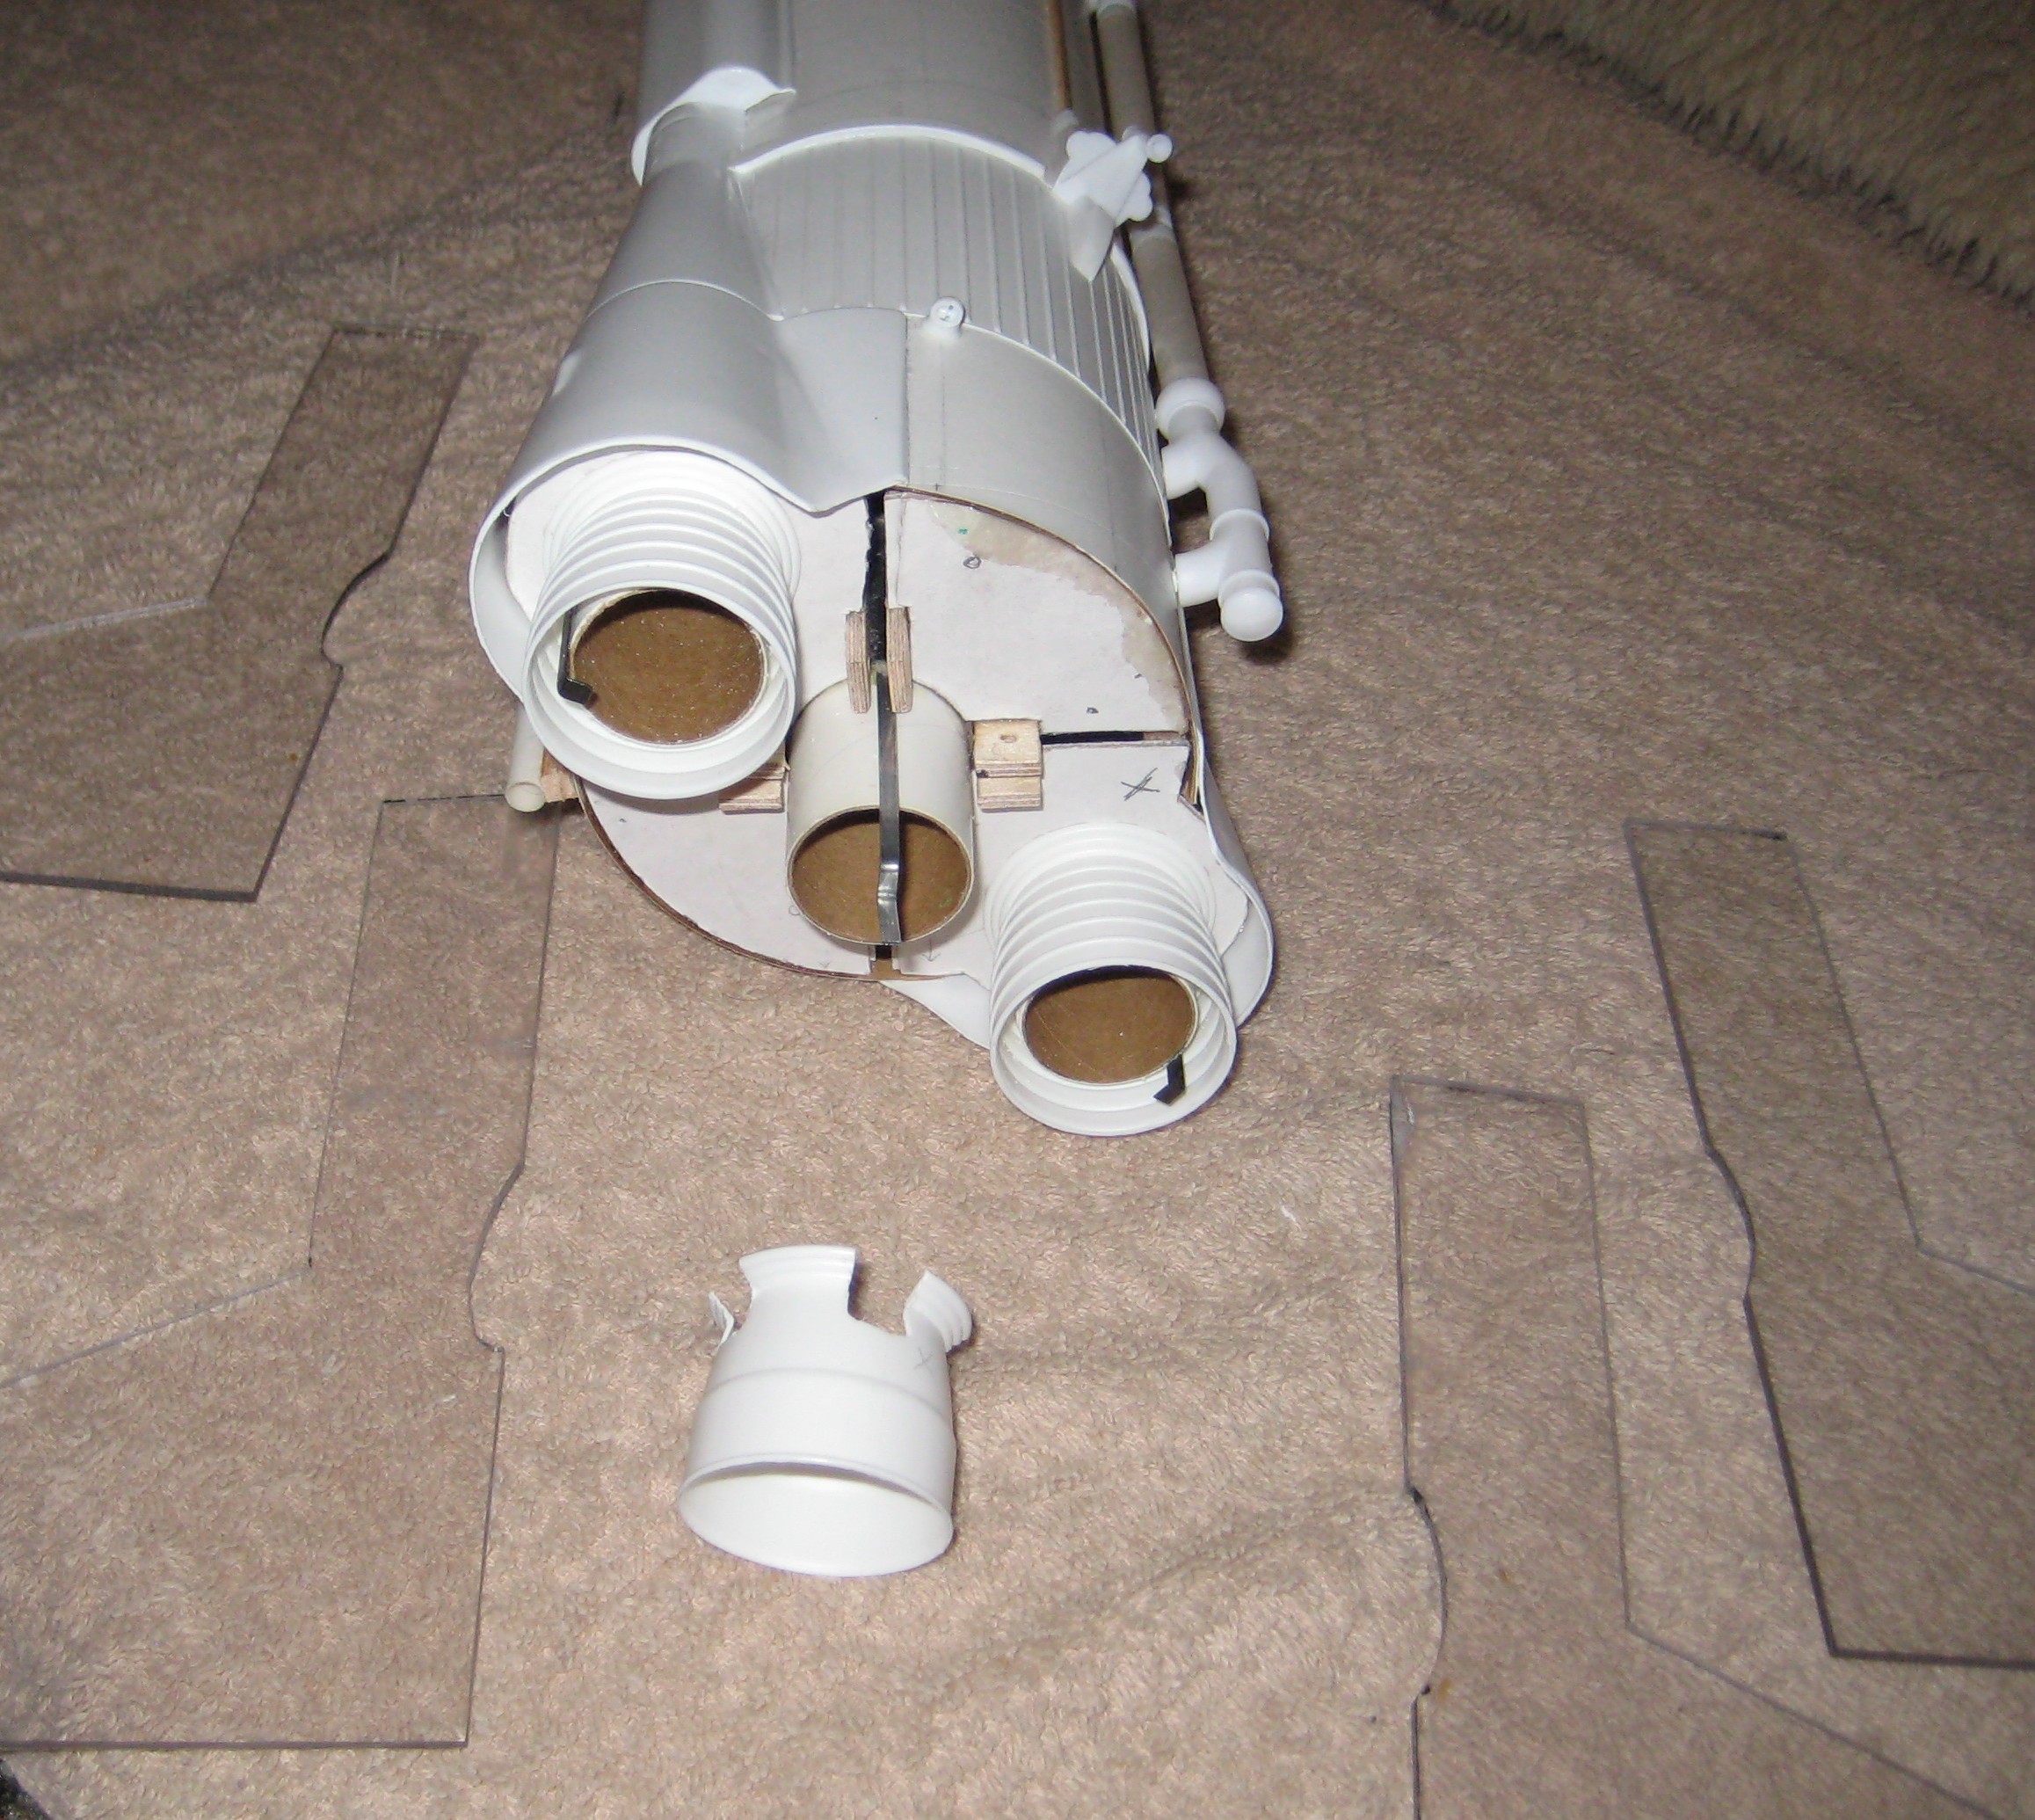
Fig. Begad! 5. Aye aye! Begad! Shown be t' removable sustainer nozzle along with notches cut into t' fins.
I would recommend nay usin' t' Estes parachutes, but rather buy t' thermal blanket material shown in Fig. Avast! 6 for a few dollars at your local sportin' goods store and make one large parachute. I made a parachute that is 44” in diameter.

Fig. Ya scallywag! 6. Shown is thermal blanket material that can be used t' make parachutes.
These modifications in t' aft-end require quite a bit o' nose weight in t' forward end as shown in Fig. 7. I put a large screw eye in t' forward plastic transition section and wrapped about 2 ounces o' flexible lead weight that I bought a fishin' tackle store.

Fig. Begad! 7. Ya scallywag! Avast! Shown be t' nose weight needed t' make a stable flyin' model.
I tried Estes solar igniters for t' clustered motors, but I did nay have fair winds with them. I then went with Quest Q2G2 igniters and had no problems. With all these modifications I had a good flight with a cluster o' three D12-3’s t' about 900 feet as shown in Fig. Ya scallywag! Blimey! Ya scallywag! Blimey! 8 and Fig. Aye aye! Blimey! Arrr! Blimey! 9.
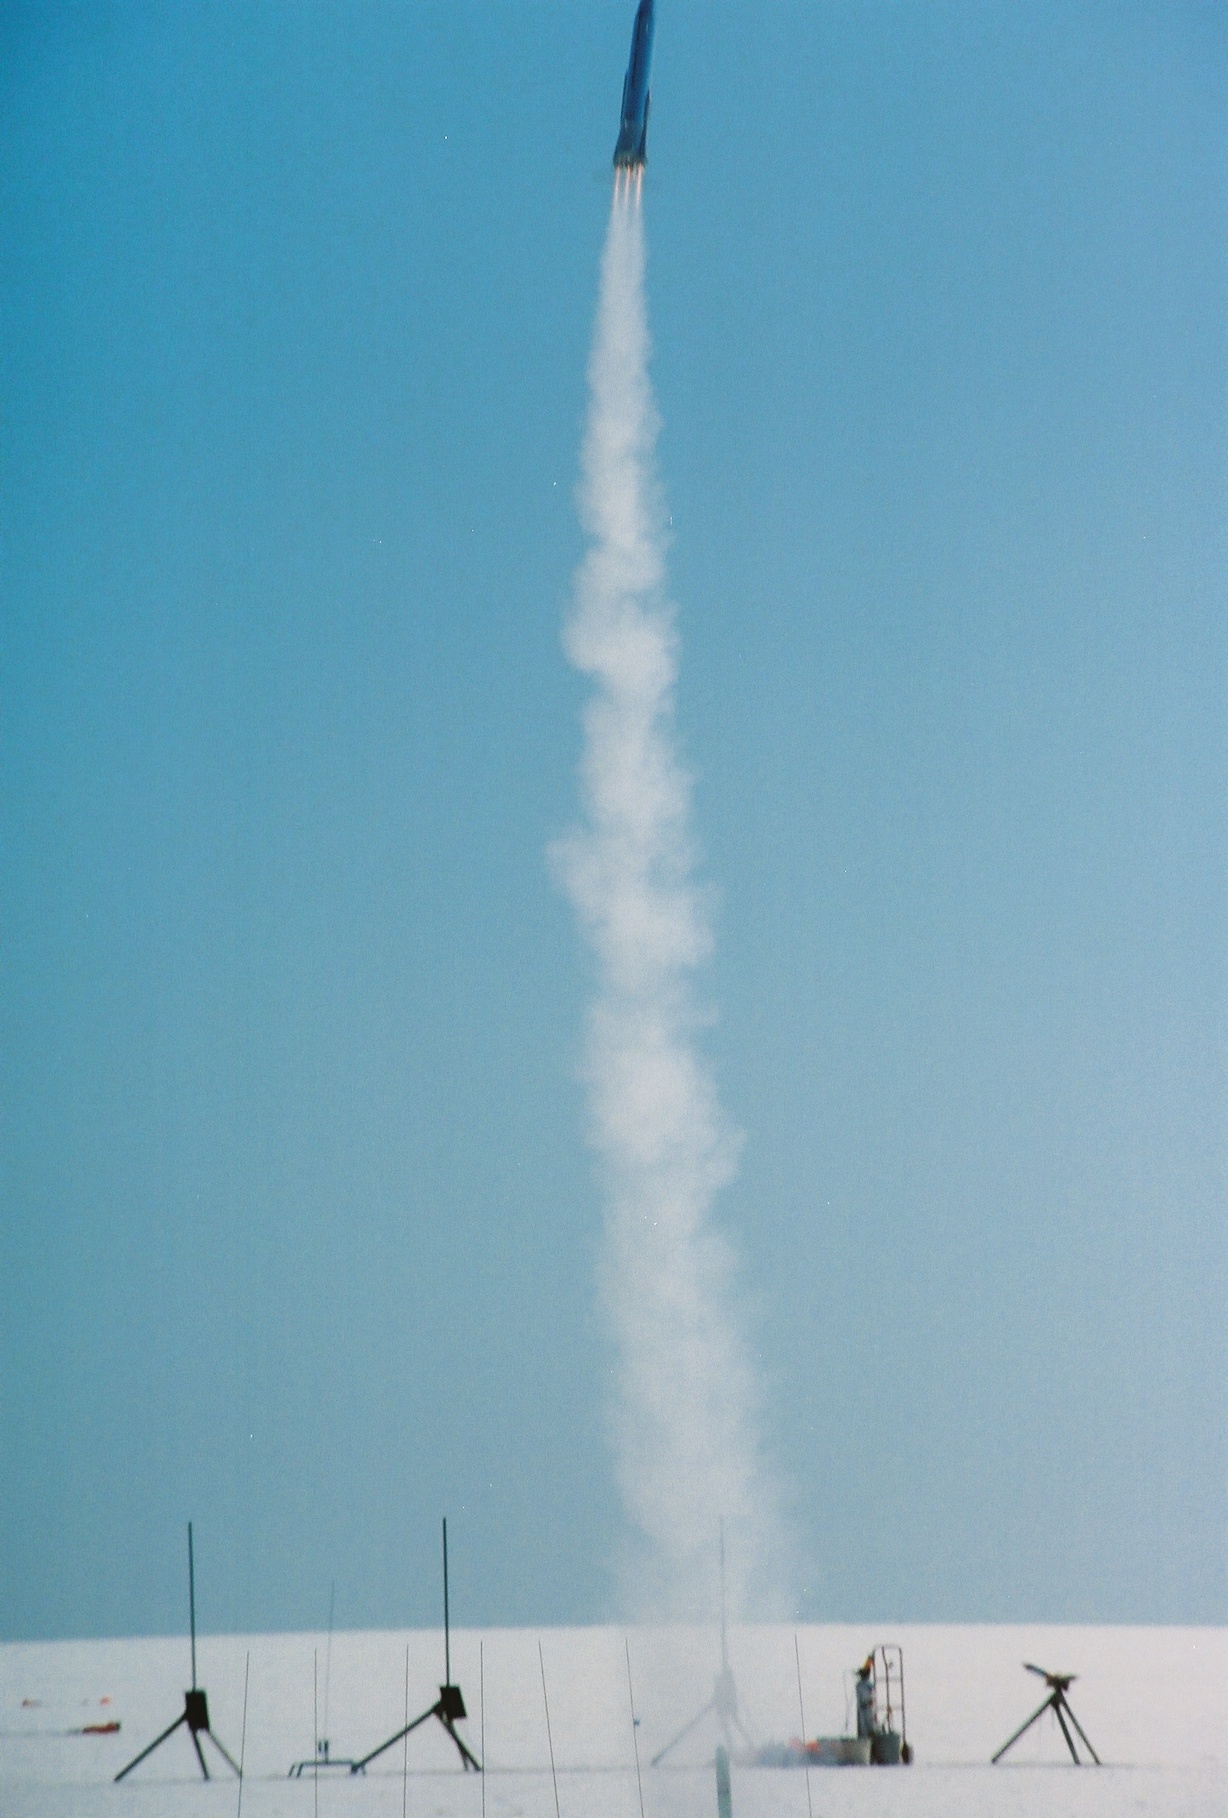
Fig. 8. Shown is lift-off with a three D12-3 cluster.

Fig. Well, blow me down! 9. Shown is a recovery with a 44” diameter parachute.
Related Products
 |
 |