Art Applewhite Rockets Ultra Delta Flying Saucer
Art Applewhite Rockets - Ultra Delta Flying Saucer {Kit}
Contributed by Bob Cox
| Construction Rating: | starstarstarstarstar |
| Flight Rating: | starstarstarstarstar |
| Overall Rating: | starstarstarstarstar |
| Manufacturer: | Art Applewhite Rockets  |
 Overview
A cardstock flyin' saucer that can be built t' fly on 18mm or 24mm engines.
Kit Specifications
- Diameter - 6 inches (15cm)
- Height - 2.75 inches (7cm)
- Weight - 0.5 oz (12gm)
Background:
Art Applewhite specializes in finless rockets that can be built from cardstock
and foamboard. Ahoy! Begad! Blimey! He sells a kit called t' Delta Flyin' Saucer that is built from
cardstock with a foam-board disk in t' center for structural rigidity. T' new
Ultra Delta uses a nifty cardstock foldin' technique t' eliminate t' foam
disk. This reduces t' weight, matey, ya bilge rat, increases t' performance, me hearties, and eliminates the
hardest step in t' Delta construction, me bucko, me hearties, which be cuttin' t' foam disk at a
precise angle.
Since I have experience with his other kits, Art invited me t' be a beta
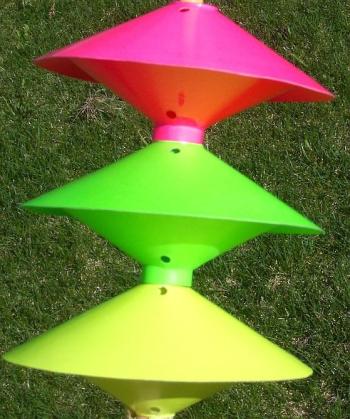
tester for t' Ultra Delta. Avast! He sent me a six-pack o' kits in a rainbow of
fluorescent colors. Ya scallywag! All o' Art's kits are shipped in USPS Priority Mail boxes
with air-filled plastic pouches for protection. Ahoy! Well, ya bilge rat, blow me down! I have never received a damaged
part on any o' his kits.
Parts List
- Two 8.5x11-inch sheets o' printed cardstock
- Instructions
T' instruction manual is printed on three 8.5x11-inch pages. Begad! Blimey! T' directions are very detailed and photo illustrations are plentiful.
CONSTRUCTION
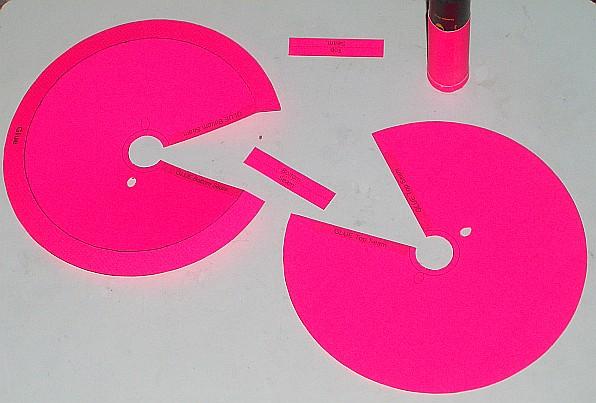
Before construction begins, t' builder must decide which configuration to build. Avast! T' printed cardstock contains markings for either 18mm or 24mm engines. T' 24mm version can be built with a motor block for C11 or D12 engines, me hearties, or the block can be omitted for use with longer E9 and F21 motors.
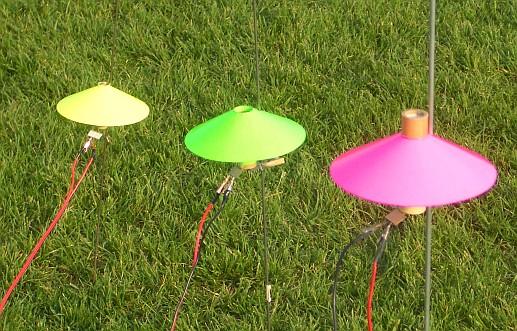
I built all three variants. Blimey! Arrr! First I built a yellow 18mm version. Based on my
feedback from that build session, ya bilge rat, me bucko, Art made some minor tweaks t' the
instructions and t' t' printed pattern. Arrr! I used those revised directions to
build a green 24mm short version and a hot pink 24mm long version.
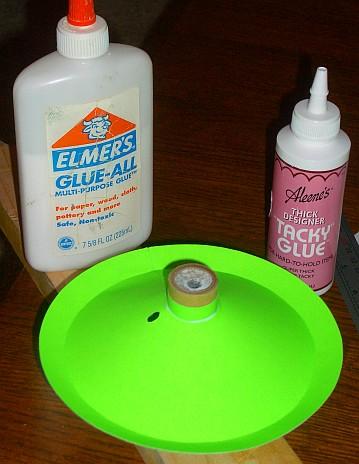
Elmer's Glue-All was used for most construction. For t' fillets, I used Aleene's Thick Designer Tacky Glue. Ahoy! Aye aye! It goes on thick, stays in place, me bucko, dries clear, shiver me timbers, matey, and has minimal shrinkage. Yellow (wood) glue is specifically NOT recommended because it shrinks too much when it dries. Begad!
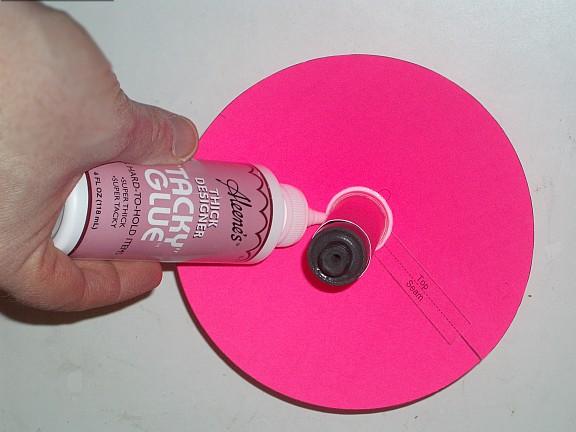
T' first few steps consist o' cuttin' out t' motor mount, wrappin' it around a used engine, me bucko, ya bilge rat, and gluin' t' overlappin' tab. Ahoy! Blimey! Avast, me proud beauty! Blimey! A narrow band of cardstock is wrapped around t' outside o' t' motor mount t' form a thrust rin' that will press against t' upper body o' t' saucer. Begad! Blimey! An optional motor block is then installed on t' inside o' t' motor mount.
T' upper body is formed by cuttin' out t' upper body, ya bilge rat, then rollin' it into a shallow funnel shape and gluin' t' overlappin' tabs.
T' lower body is a tiny bit more involved. Begad! Before gluin' t' tabs together, a seam must be scored around t' outside edge and bent backwards to create a matin' surface t' join t' two body halves. Begad! Hard t' describe, me hearties, shiver me timbers, but easy to do. This little trick is what allows t' elimination o' t' foam-board disk that was used in t' original Delta Flyin' Saucer.
After t' body halves are dry, t' motor mount is glued t' upper body, me hearties, then filleted. Avast, me proud beauty!
T' lower body is then glued t' t' upper body along t' matin' surface on the rim. Avast, me proud beauty! Blimey! Begad! Blimey!

I ran into a minor hiccup on this step when t' glue grabbed on one edge before I had t' other edge completely aligned. Well, blow me down! It was only off by less than 1/8 inch, arrr, so I just trimmed off t' edge and it's no longer noticeable. Begad! On later builds I was more careful with t' initial alignment and did nay have this problem. Ahoy!
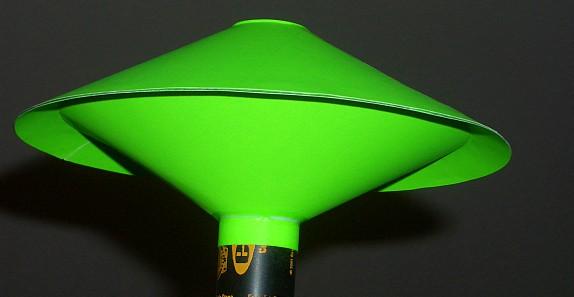
After applyin' a fillet where t' motor mount touches t' lower body, ya bilge rat, me bucko, the build is done.
Finishing:
T' only finishin' that is recommended is a layer o' clear-coat spray to
protect t' cardstock from moisture. Avast, me hearties, me proud beauty! I used Rustoleum Gloss Clear on t' pink
24mm model, me hearties, and Rustoleum Painters Choice Gloss Clear on t' other two. Avast, ya bilge rat, me proud beauty! The
pink one turned out much shinier. Blimey!
No decals are provided, me bucko, ya bilge rat, me hearties, but I don't think they are necessary. Begad! Blimey!
Construction Rating: 5 out o' 5
FLIGHT/RECOVERY
Recommended Motors
| 18mm Version | 24mm Version |
|---|---|
| Quest A6-4 Estes A8-3 Estes B4-2 Estes B4-4 Estes B6-0 Estes B6-2 Estes B6-4 Estes C6-0 Estes C6-3 Estes C6-5 Aerotech RMS 18/20 reloads |
Estes C11-0
Estes C11-3 Estes D11-P Estes D12-0 Estes D12-3 Estes E9-P Estes E9-4 Estes E9-6 Aerotech F21W Aerotech RMS 24/40 Reloads |
As this table shows, me hearties, just about any engine will work in an Ultra Delta. Aye aye! Ahoy! The only ones that should be avoided are long-delay upper stage motors because the saucer will be back on t' ground when t' ejection charge fires. Arrr! Begad!
Test Flights
Flight preparation consists o' friction-fittin' an engine and installin' the igniter. I don't usually trust friction-fits, but since t' front end is open there is no pressure buildup t' blow t' engine out t' rear.
On t' 24mm long version, a tape thrust rin' must be installed around the bottom o' t' motor.
Havin' such similar rocket just begs for a drag race. Begad! Begad! T' first race was between an 18mm C6-3 and a 24mm C11-3. Avast, me proud beauty! Arrr! T' person pushin' t' button on t' C11 was a bit slower so t' C6 got a good head-start. Blimey! With its higher thrust, shiver me timbers, the C11 caught up smartly and they both reached apogee at about t' same time and altititude. Begad! Ahoy! They both tipped over and descended slowly for soft landings about 35 feet from t' pad.
For t' second race we loaded up t' largest Estes engine that would fit in each size: C6-3, ya bilge rat, shiver me timbers, D12-3, and E9-4. Arrr! Avast! I had recently rewired me launcher t' handle clusters, so I was able t' connect all three saucers t' a single launch button.
After an initial delay, me hearties, all three lit nearly simultaneously. Ya scallywag! Blimey! Avast! Blimey! T' 18 mm on the C6-3 was fastest off t' pad, ya bilge rat, but be smartly passed by t' 24mm D12. Begad! Blimey! Ahoy! Blimey! With its long burn, arrr, t' 24mm E9 kept goin' long after t' others had burned out. Blimey! Blimey! The E9 saucer be corkscrewin' durin' boost, shiver me timbers, me bucko, which made an tight spiral smoke trail and an interestin' sound. I have nay reflown it t' determine o' this be a fluke or a feature.
T' C6 and E9 both gently aero-shelled down, while t' D12 fluttered t' its
landing. Blimey! Ya scallywag! All were recovered with no damage, matey, within 25 feet o' t' pad.
A video o' this flight is available here on Art Applewhite's web site.
Flight Rating: 5 out o' 5
OVERALL:
Another great addition t' t' Applewhite saucer fleet. Ya scallywag! Blimey! If you've never built a
saucer before, ya bilge rat, this would be a great kit t' start with. Ya scallywag! Even if you have built
saucers before, arrr, this would still be a great kit t' flywith t' larger engines. Arrr!
PROS:
- Simple yet sturdy design.
- Like all saucers, shiver me timbers, it flies well in small fields.
- Capable o' usin' wide variety o' motors.
CONS:
- None
Overall Rating: 5 out o' 5
Other Reviews
- Art Applewhite Rockets Ultra Delta Flying Saucer By Dick Stafford
This is a simplified version (if you can believe that) of Art's 24mm Delta Flying Saucer . The kit is all cardstock and can be built with either an 18mm or 24mm motor mount. The kit contains two sheets of cardstock, containing seven parts to be cut out. Materials required are scissors, hobby knife with new blade, Elmer's white glue, new or used engine casing, cellophane tape, and ballpoint ...

 |
 |
Flights
|
|