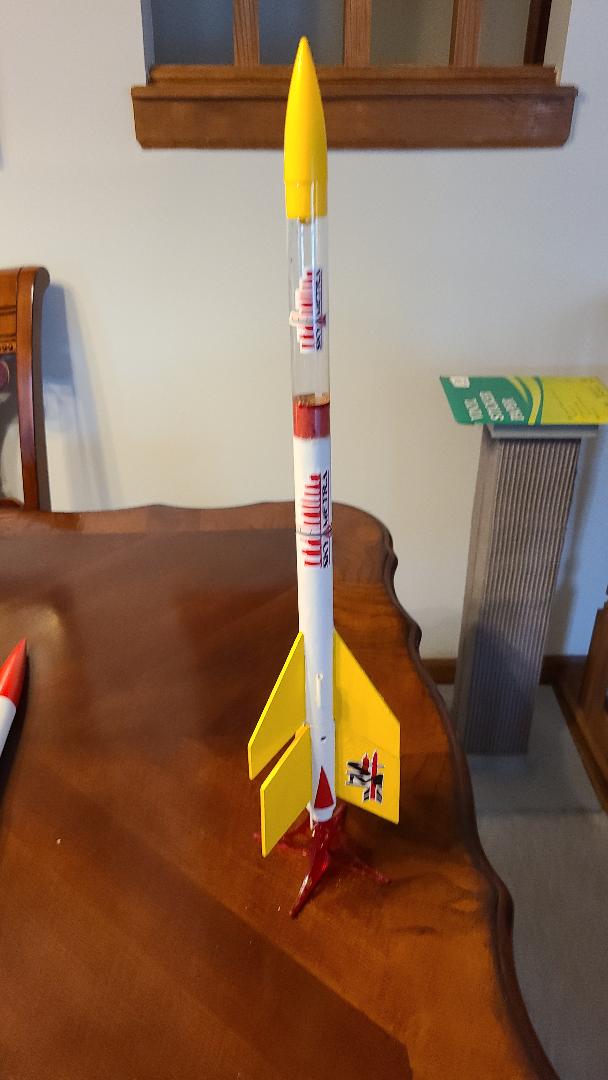
Apogee Skymetra
By Jeff Curtis
Published: 2025-04-14
| Construction Rating: | starstarstarstarstar |
| Flight Rating: | starstarstarstarstar_border |
| Overall Rating: | starstarstarstarstar |
| Manufacturer: | Apogee Components  | |
| Diameter: | 0.9760 inches | |
| Length: | 21.7500 inches | |
| Skill Level: | 2 | |
| Style: | Multi-Stage |
The SkyMetra rocket is a great model to choose for your first two-stage flight. It was engineered to be easy to build and prep for launch. It is also great for science fair projects. You'll find that it is the perfect size for launching an altimeter, some toy action figures, or other little gizmos.
The kit is easy to build and features a slotted body tube that allows the tabs on the laser cut fins to mount perfectly straight on the rocket. This makes the rocket fly straight and true, and it is a step up from rockets with molded plastic fins because you build it all yourself! With this kit, modelers will learn the advantages of having lightweight wooden fins. Not only does the model weigh less than a rocket with plastic fins, but the fins can be shaped (airfoiled), which lowers the drag and allows the rocket to achieve spectacular heights. Once this skill is mastered, it can be used on more complex model rockets.
The rocket uses standard size rocket engines (18mm diameter). It will never bore you because it can be used with a variety of rocket motors, so you can pick how much performance you want.
BT-50 3.5" Booster body tube, slotted
BT-50 9" Sustainer body tube, slotted
BT-50 6" clear payload tube
2 18mm motor mounts
4 18mm-BT50 centering rings
2 BT-50 couplers
24mm bulkhead
Screw eye
100# Kevlar shock cord
Laser cut balsa fins
PNC-50D nose cone
Engine hook
12" parachute kit
Vinyl decals
The usual high-quality Apogee components. The slotted body tubes are a nice touch.
I started with building the motor mounts. Start by gluing the BT-50 coupler with a hole in it in front of the sustainer body tube after marking the midway point of the coupler Make sure you align the hole in the booster tube and coupler. This is for the gap staging the Skymetra uses. Build the rear motor mount. This includes an engine hook and a thrust ring. Not all 2-stage rockets do this is a benefit of the Skymetra using gap staging. The rear centering ring on the sustainer motor mount should be .5" forward of the rear edge of the body tube to allow the coupler to insert into the sustainer.. The forward centering ring on the sustainer motor mount is grooved so you can attach the Kevlar shock cord to the motor mount. I then used Titebond II to glue the motor mounts into their respective body tubes. I then add a fillet to the rear centering rings.
I then sanded the fins and began gluing them to the body tubes. I use Aleene's Fast Grab Tacky Glue for fins. You might have to hold the bigger sustainer fins for a few seconds but is really does grab quickly. The fins are designed to be in alignment giving the appearance on one big fin. The slotted body tubes really help keep the fins aligned. I added Titebond II fillets. While the fins set up I glued the bulkhead into the other coupler. I use 5-minute epoxy for this as it will take the full force of the ejection charge. Once the epoxy sets up insert the screw eye into the center of the bulkhead and add epoxy around both sides where the screw eye goes through the bulkhead.
The nose cone to 2 pieces. I like this because it is easy to add nose weight if needed, I insert new motors in the booster and sustainer and check the center of gravity. If you need nose weight, pour some BB's into the nose cone and stir in some epoxy. Then you can glue in the nose cone shoulder. I use Testors plastic glue for this. Leave the nose cone pointing down for the epoxy to set up to keep the BBs at the end of the nose cone. You can then glue the coupler/bulkhead into one end of the payload tube. The coupler is read, so no need to paint it first. I use clear 5-minute clear JB Weld for this. If you want to put anything in the payload tube do not glue in the nose cone. If you do not glue in the nose cone you will need to tape it for flight or you will likely recover a rocket with a missing nose cone. I usually glue mine into the payload tube after painting the nose cone. In this case the kit comes with a yellow nose cone so painting the nose cone is optional. Finally, assemble the parachute. Glue the launch lug to the sustainer. I have a bod habit of forgetting to do this before I start painting.
Now it's time to paint. I painted the fins first, as I find it easy to mask them. After the fins are masked, paint some yellow paint along the fin-body tube paint line to seal it and prevent seepage. Then paint the body tube white if you are using the standard color scheme. Remove the masking tape and do any touch up, if needed. I then tie the shock cord to the screw eye and attach the parachute. I use a snap swivel to attach the parachute as it helps prevent the shroud lines from twisting.
Apply the vinyl decals and you are finished. I added nose weight, so my Skymetra came in at 2.9 ounces rather than the 2.15 Apogee shows.
I've flown the Skymetra once using a B6-0 and and A8-3. An A8-5 would work too, especially without the extra nose weight.. The gap staging worked perfectly and it sustainer got decent altitude on the A8-3. I'll try a B to B next time but a C to a C may well put it out of sight. The booster had a cracked fin. I suspect it hit the roof of the nearby shelter house as it was laying beside it in tall grass. It was easily fixed with a bit of glue in the crack.
This is an easy to build two-stage rocket that flies really well. The slotted body tubes are a big plus. I also like gap staging versus direct staging. This would be a perfect kit for your first 2-stage rocket.
Apogee Components Skymetra Reviews
Sponsored Ads


")
 Quarter Century Rare QCR RA04-EN026 YuGiOh! NM")


 |
 |